Guide To Creating A SAS Token For your Blob Container
Create a Blob Container With a Private (no anonymous Access)

Introduction
In the ever-expanding world of cloud computing, security is still critical. Microsoft's cloud platform, Azure, provides a plethora of tools and services to protect your resources and data. Shared Access Signature (SAS) tokens are one such technique that allows restricted access to Azure resources without sacrificing security.
A distinct string created in accordance with particular permissions and limitations that you specify is known as a Shared Access Signature (SAS) token. Access to Azure resources like blobs, queues, files, and tables can be limited with its help. SAS tokens provide the ability to enforce protocols, IP address limitations, and permissions. They can also have a time limit.
Follow the steps:
Step 1 - Create a Storage Account: Follow the steps in the link to create a storage account https://ladyintech.hashnode.dev/step-by-step-guide-creating-a-storage-account-and-adding-blob-container-in-azure
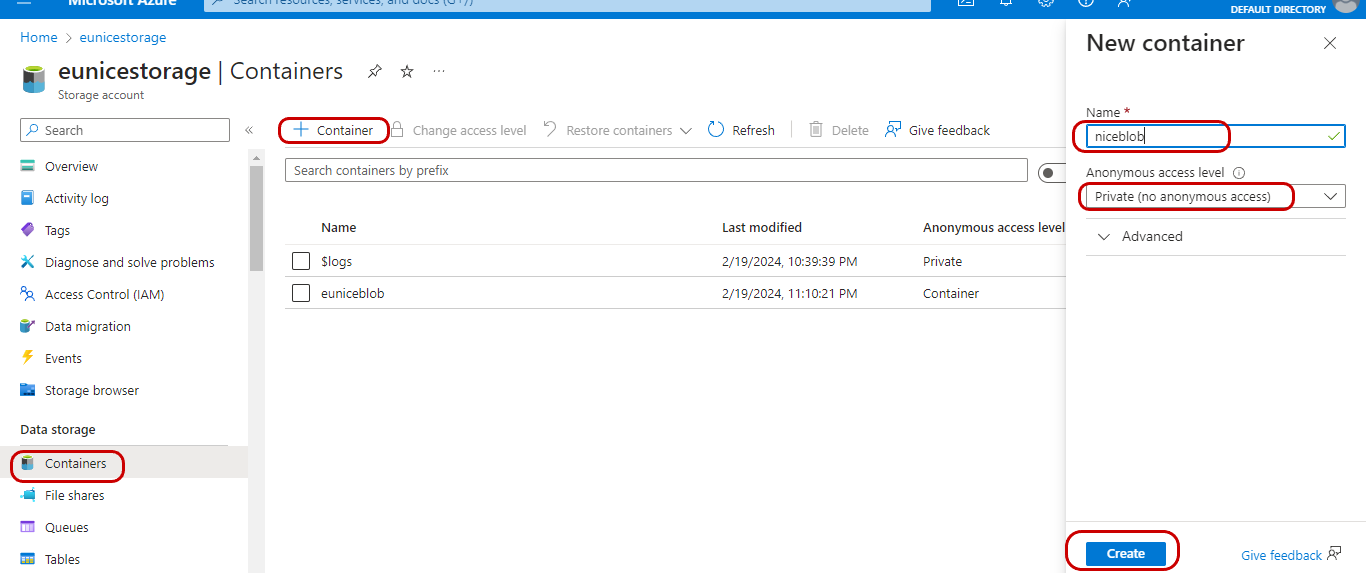
Step 2 - Create a Container : On the left page "Click on" "Containers" then "Click on" "Container +" Fill in details on the New container "Name container" Choose Access "Select" "Private(no anonymous access" "Click" "Create"
Note: The name for the container should be globally unique
Step 2 - Upload Files: Refer to step 1 and "Click on" link follow the guide on uploading files to your blob container
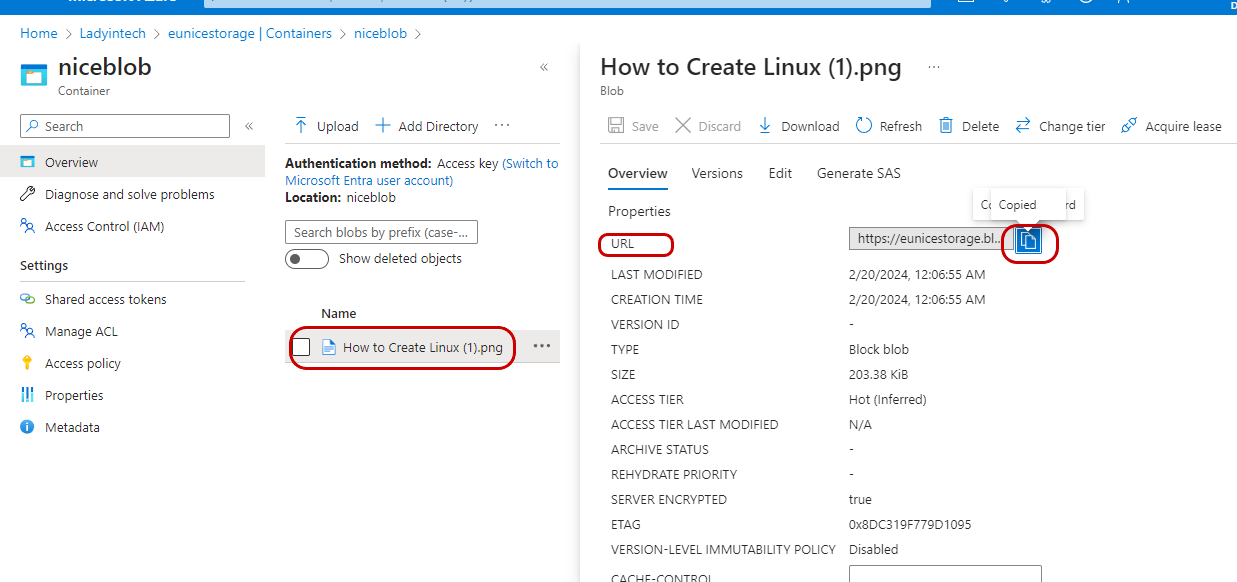
Step 3 - Copy and paste URL for review on a web browser On the left side of the page "Click on" 'File" Locate the URL on the right side of the page and Copy URL link "Click on" "blue box"
a. Error message because our blob access is on private and one of the ways to gain access to files is to generate SAS tokens with a "no-access" policy

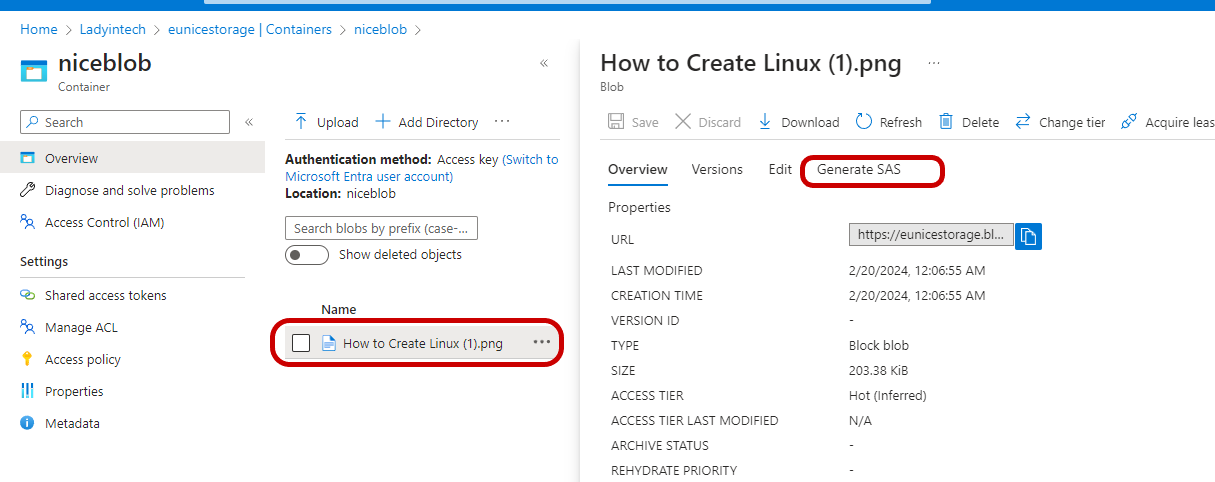
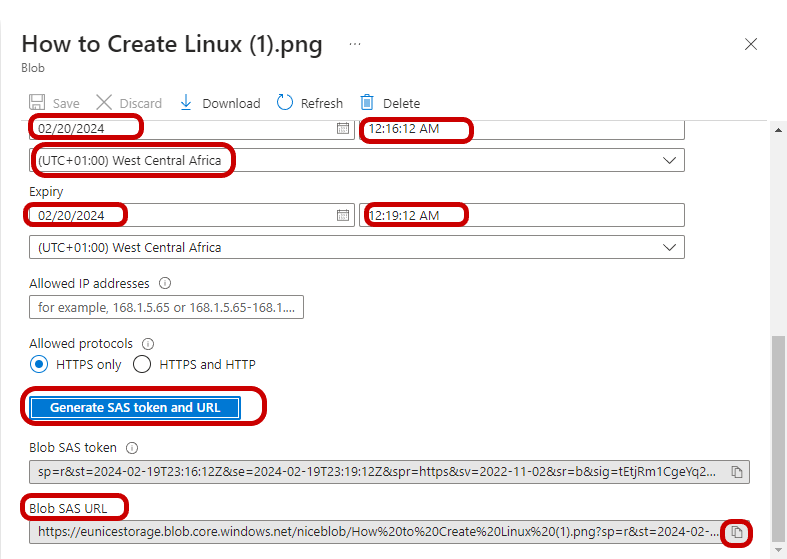
Step 3 - Define your SAS Token Parameters: On the left page "Click on" "File" you want to grant access "Click on" "Generate SAS"
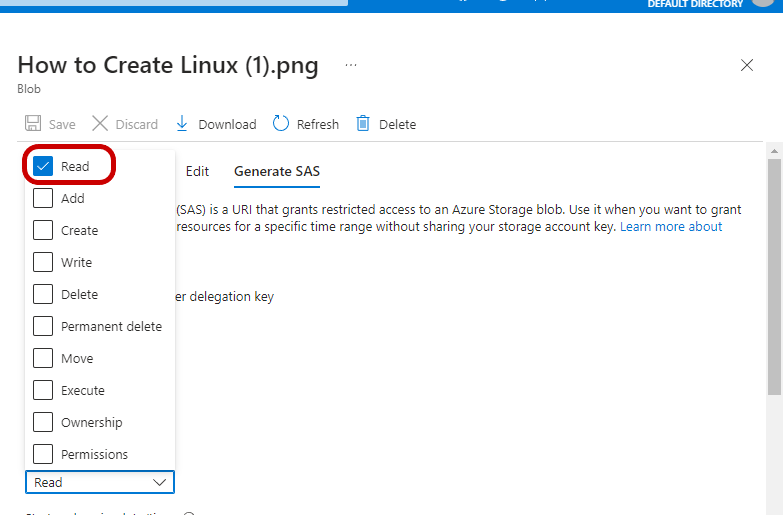
a. Permissions: Choose the specific permissions you want to grant, such as read, write, delete, or list. "Check box" "Read"
b. Start and expiry time: Set the period during which the SAS token is valid. This helps in enforcing time-bound access. We will be setting our access time to 4minutes. Note: The time on your Local machine should be correct
IP address restrictions: Optionally, restrict access to specific IP addresses or ranges
"Set all your time" as shown in the highlighted red boxes "Click on" "Generate SAS token and URL" then "Copy Blob SAS URL"
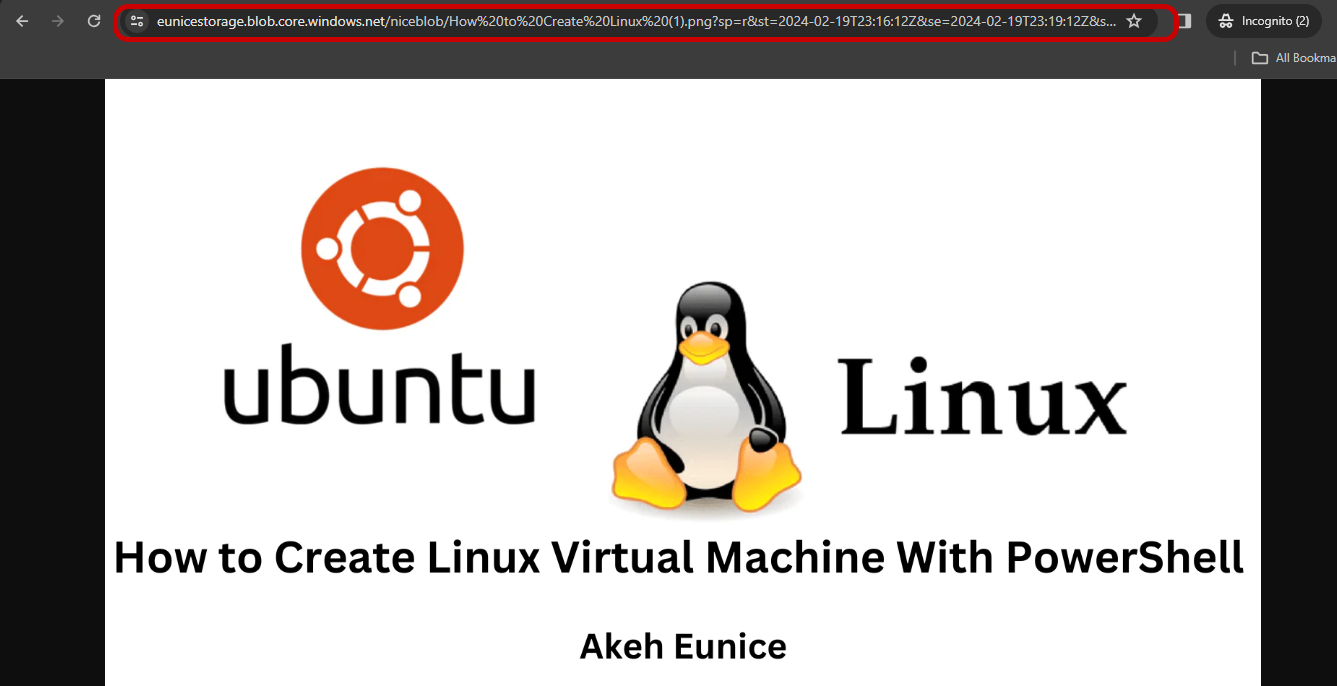
c. Paste URL on Web Browser
After 4minutes the SAS token will expire and the URL will not be valid will give you an error message
Conclusion
Granular access controls on Azure resources can be effectively secured with the help of Shared Access Signature (SAS) tokens. Your critical data and resources can be further secured by producing SAS tokens with a "no-access" policy, which makes sure that only authorized users with the right credentials can access them. You can strengthen your overall security posture in your Azure environment by enforcing private, no-access permission using SAS tokens in the manner described above.


