A Beginner's Guide to Creating a Windows 11 Pro Virtual Machine in Azure
Step by Step Guide to Create & Connect a Windows 11 pro desktop


Introduction
In the era of digital technologies, cloud computing has become a fundamental part of the modern technology infrastructure. Among all the offers in the market around cloud computing, Microsoft Azure is the one that offers a broad set of services for a business and an individual to do so. Another core offering in Azure is creation and management of virtual machines (VMs) which can be used for various purposes such as development, testing, and execution of applications. The beginner's guide takes you through step-by-step with creating a Windows virtual machine in Azure, adding it to a resource group, and connecting to it.
Outline
Step 1: Log in to the Azure Portal
Step 2: Create Virtual Machine
Step 3: Deploy and Connect to the VM
Step 4: Install RDP (Remote Desktop Protocol)
Step 5: Log into the Windows 11 Pro Remotely
Step 6: Clean your resources & Azure Environment
Step 1: Log in to the Azure Portal
Log in to the Azure portal using your Azure account credentials. If you don’t have any Azure account details, this would be a nice time to sign up for a One month free account through the Azure website.

Step 2: Create Virtual Machine
a. In the Azure portal, search for "Virtual machines"
b. Click "Virtual machines" from the pop up
C. Click on "create" , select the first Highlight on the pop up

d. Fill in each of the icons highlighted in the box on your Azure dashboard
1a. Basics: Select your Subscription and Resource group (Follow link to and see how to create a resource group) https://ladyintech.hashnode.dev/step-by-step-tutorial-on-setting-up-an-azure-resource-group

b. Name your VM, Select Region and Availability Zone

c. Select security type , Image ,VM architecture should be left on default and click on sizes to select the size of memory , CPU & Storage

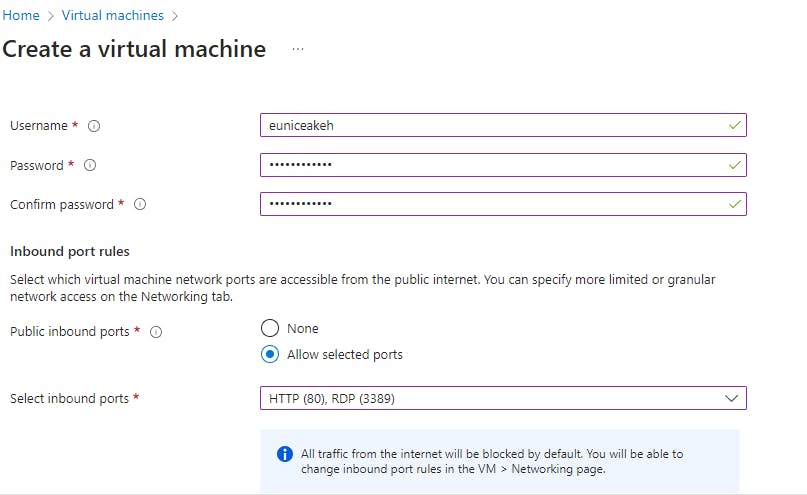
d. Give your Virtual desktop a username and password
Note: you will use it to log into your windows 11 Pro desktop remember your info.
e. Tick the Licensing and click on 'Disks'

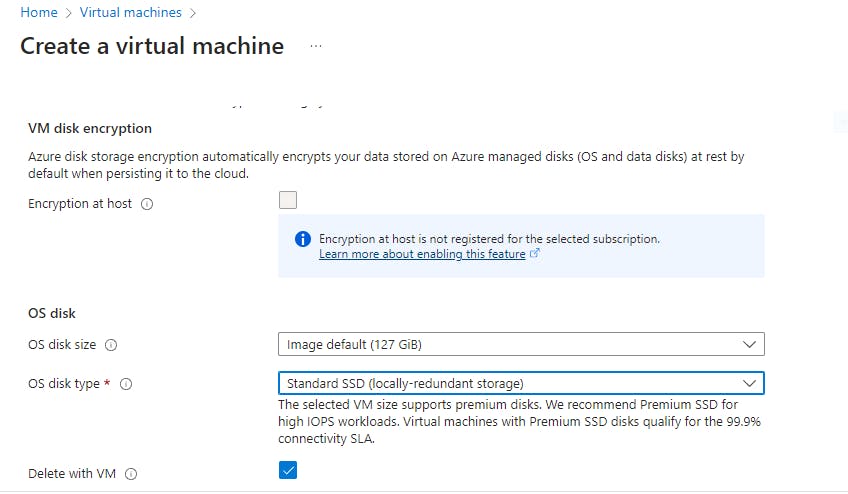
2a. Disks : Select "OS disk size" , "OS disk type"
Note: I choose SSD and delete VM because this is a demo
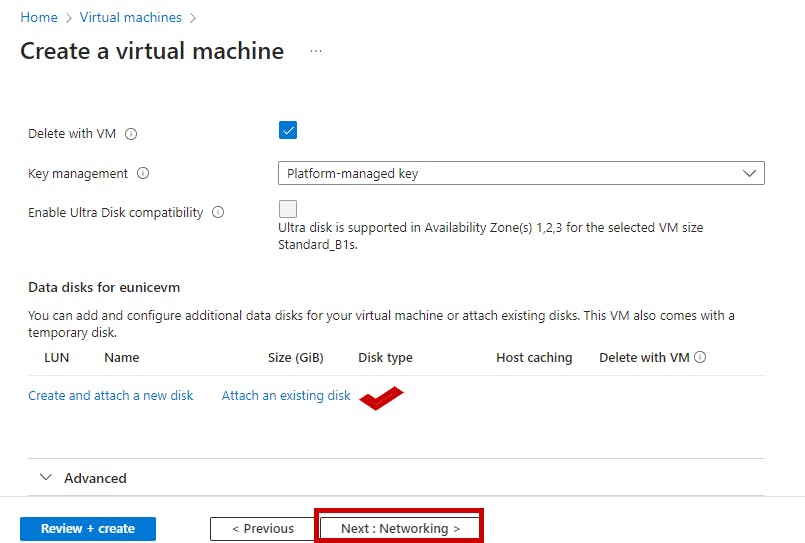
b. Create a new disk if needed ,click on Next: Networking
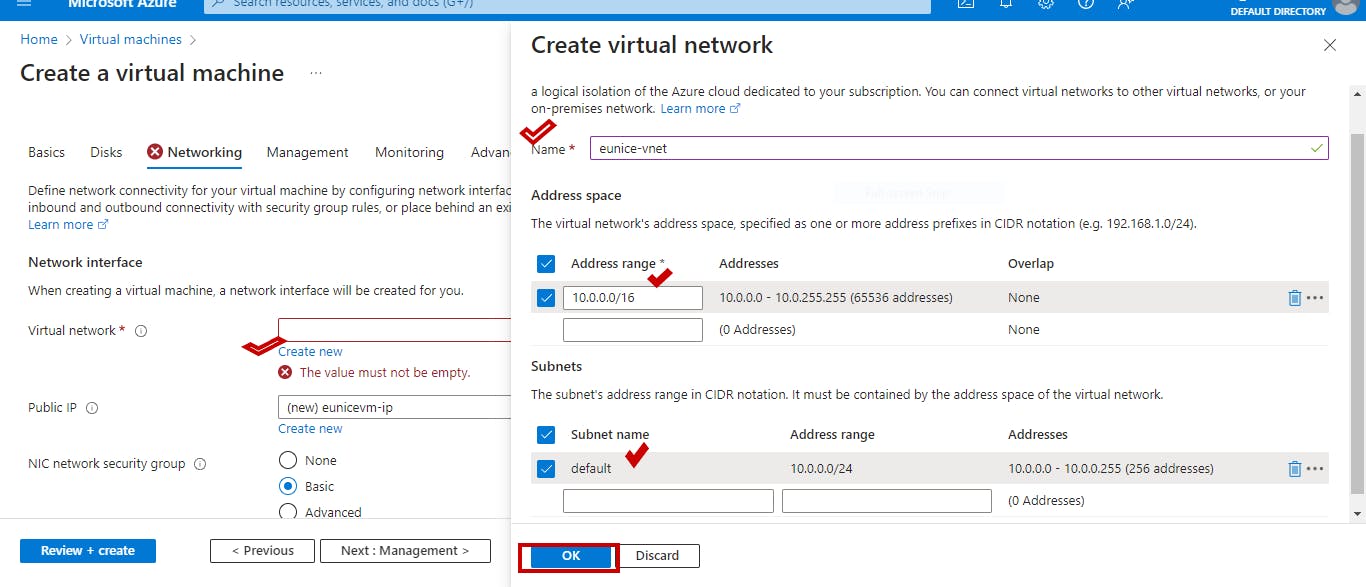
3a. Networking : Click on "create" new by Virtual network on the left page (it will open up the page on the right)
b. Name your Virtual Network(VNET) , use the default IP address and subnet then click "OK"
c. Click on "Next: Management"
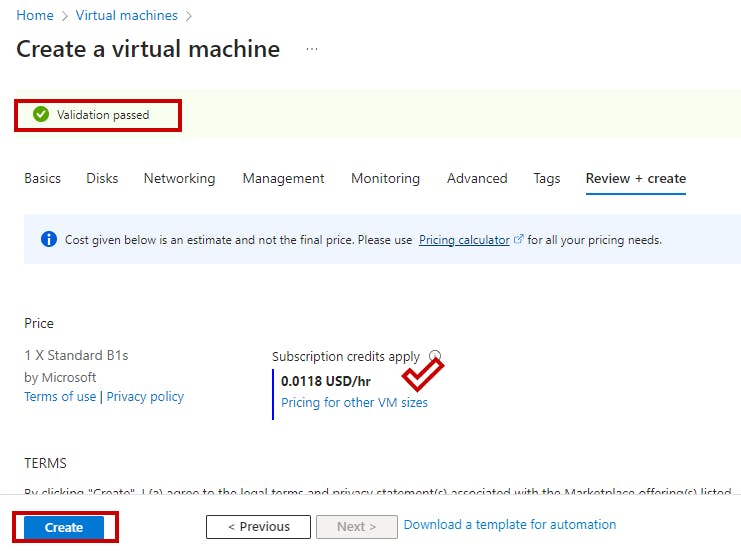
4a. Proceed by maintaining the default settings on the monitoring, advanced, and tag pages, then navigate to the "review+create" option located in the upper-right corner of the page and click on it.

5a. If review of the summary of configuration is right then it will show validation passed and see your bill then click create
Step 3a. Wait until deployment completes

b. Deployment complete ,click on Home on the left corner of the page
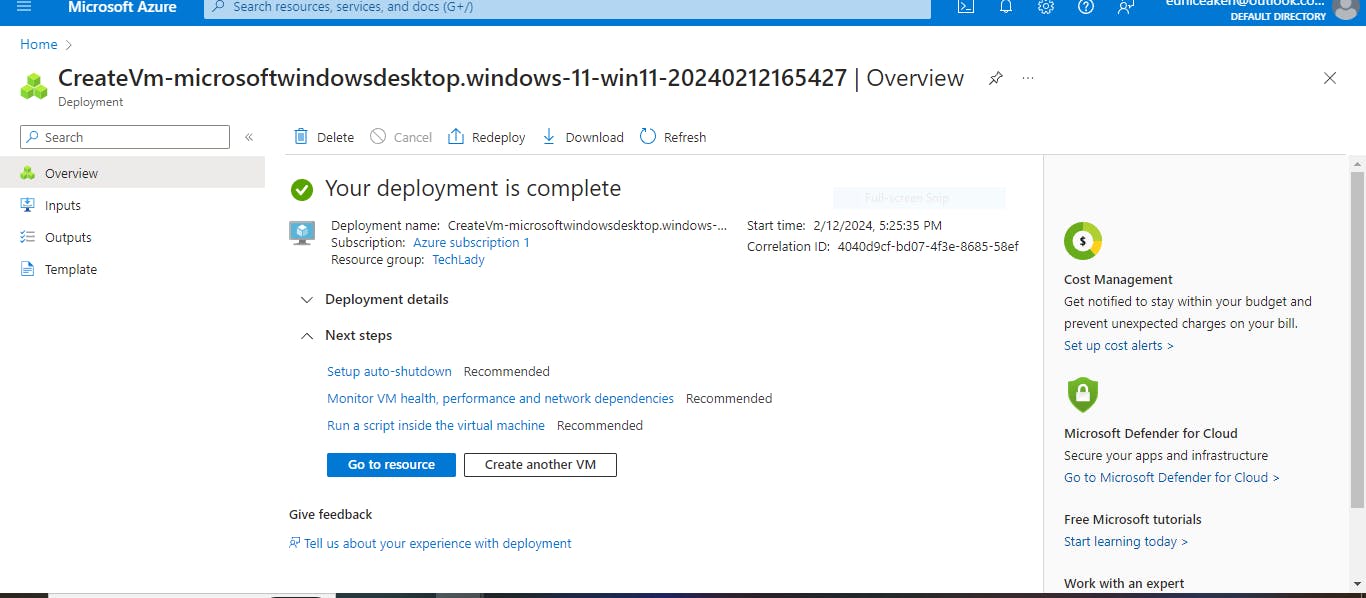
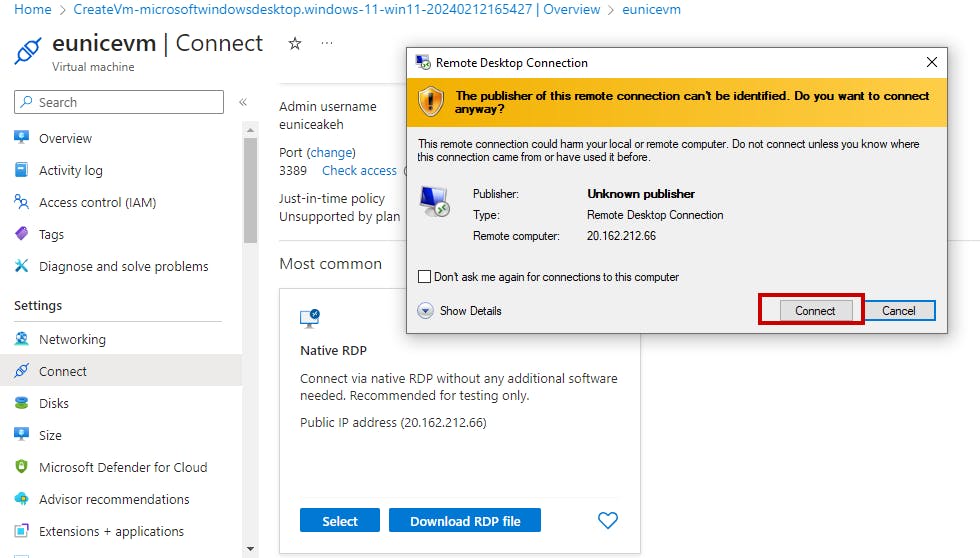
C. Click on your "VM", click on connect

d. Click on "Download RDP File" (Remote Desktop Protocol (RDP)

e. Click on "connect"
Step 5: Log into the Windows 11 Pro Remotely
a. Input your" password" ( the password you filled on the basics page refer to 1d above)
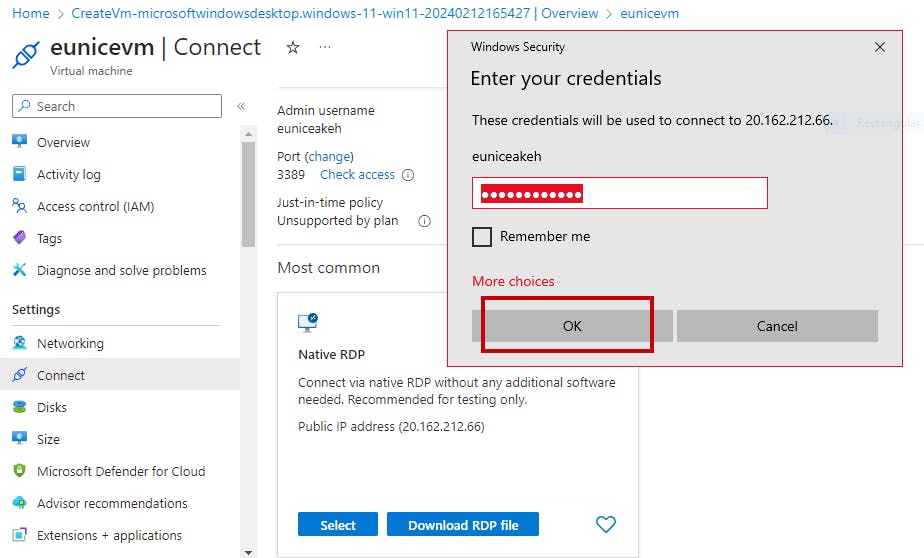
b. Click on" yes"

C. Windows 11 Pro Desktop

Step 6: Clean your resources & Azure Environment
a. Click on "home" , Navigate and click on your "resource group"
b. Click on "Delete Resource groups"
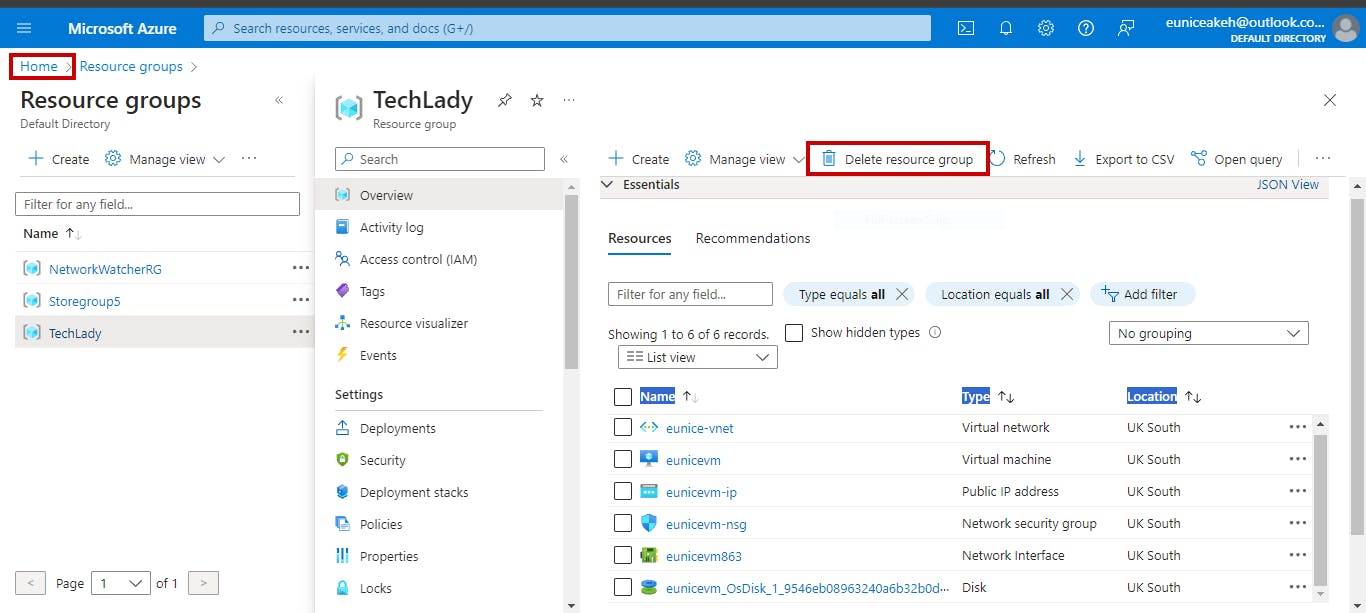
c. Enter the name of your Resource group ( the exact name) and click "Delete"

e. Go to "Home" at the left corner of the page, Click on "NetworkWatcherRG" (It is a default resource group created for you by Azure)
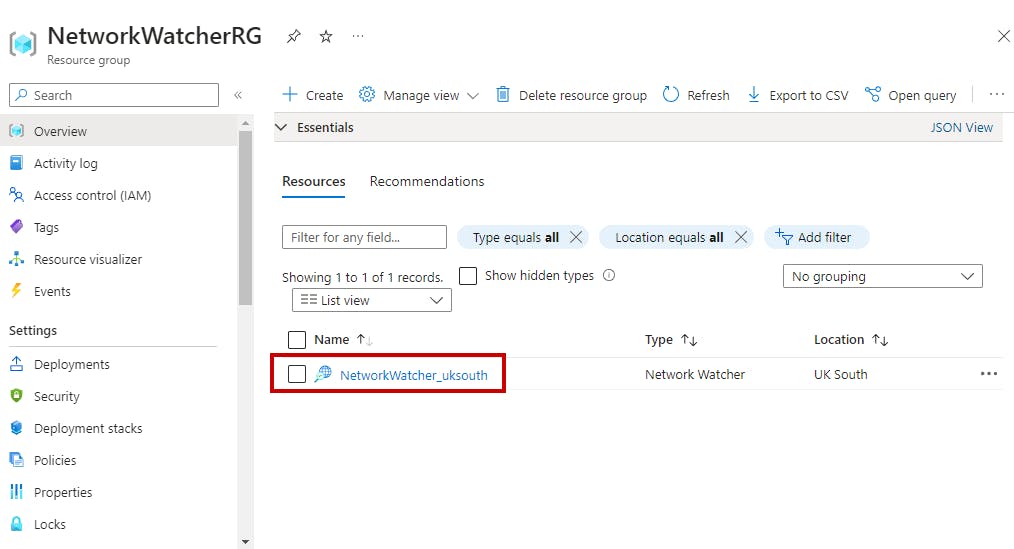
f. Enter the name of the "resource group" and click "delete"

I hope you find this article interesting to read and helpful.