Step-by-Step Tutorial on Setting Up An Azure Resource Group.

Outline:
Step 1 : Open the Azure Portal and log in
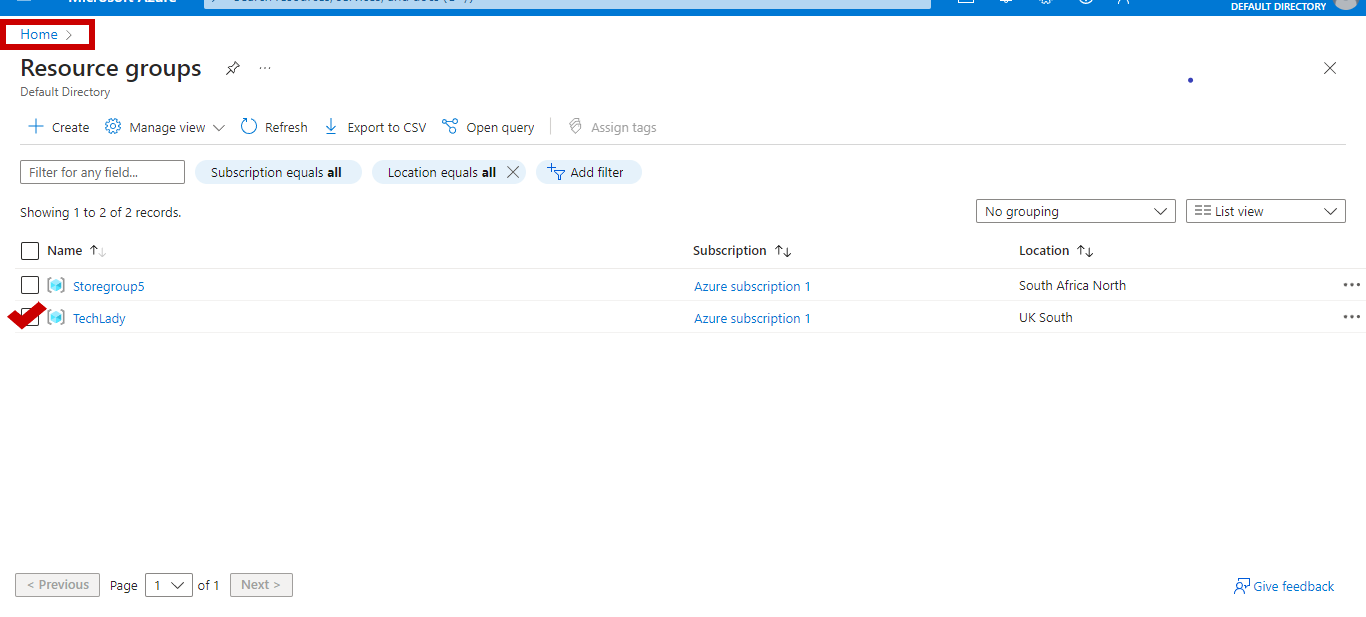
Step 2 : Navigate to Resource Groups
Step 3: Create a New Resource Group
Step 4 : Fill in Resource Group Details
Step 5 : Fill in Tags
Step 6 : Review and Create the Resource Group
Step 7 : Await Deployment
Images to guide you through the steps
Step 1 : Open your web browser and navigate to the Azure Portal. Use your Azure account to log in.
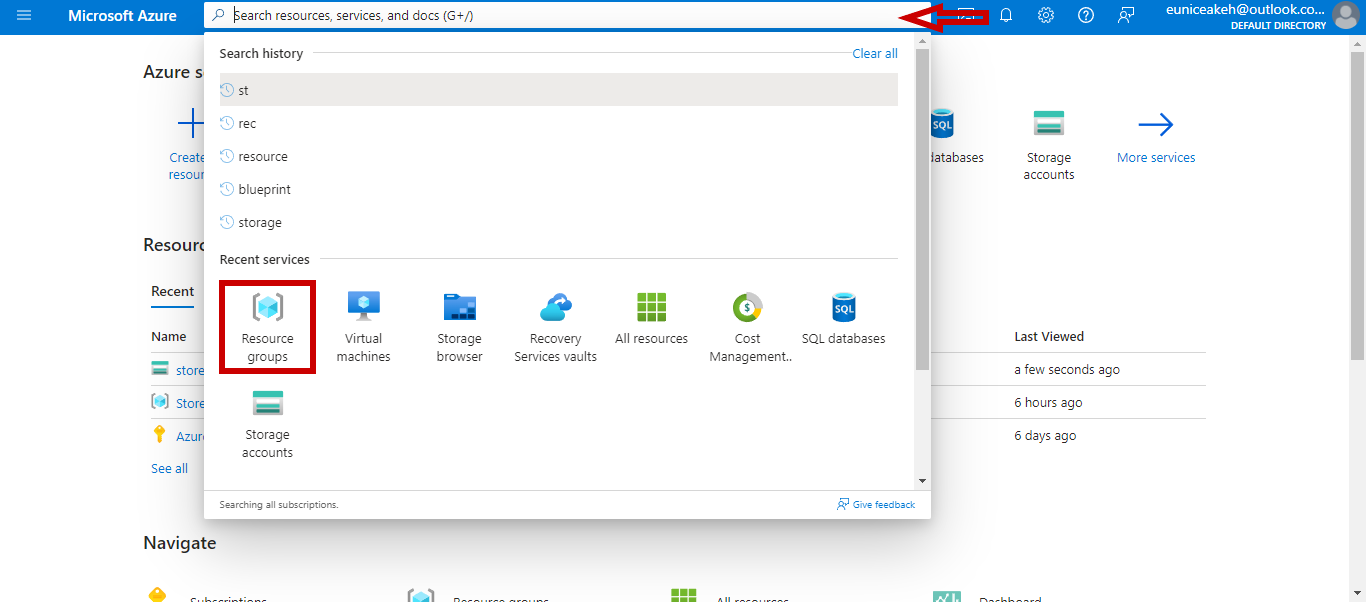
Step 2: Click on the search bar (the arrow pointing Left), then click on the highlighted Resource groups
Step 3: Click the "Create resource group" button to start a new resource group

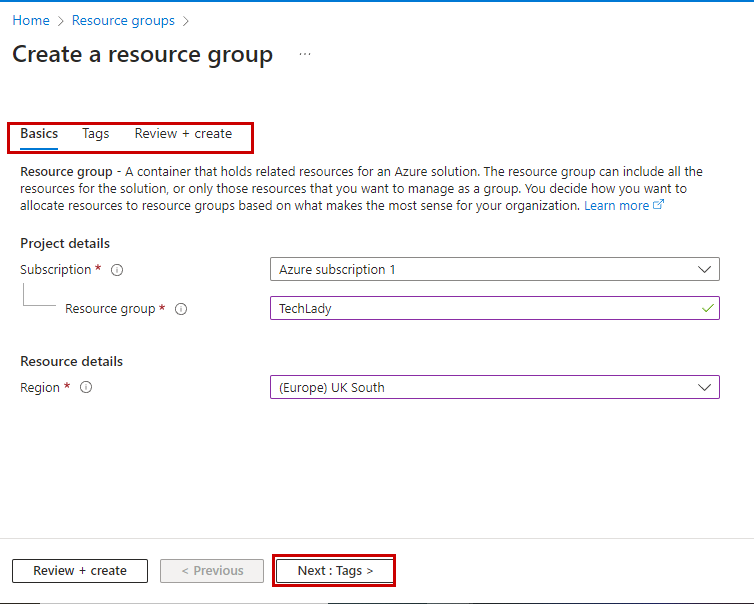
Step 4: The highlighted box is the overview of the Resource Group Details to fill in
a. Select the Azure subscription that you wish to use
b. Give your resource group a name. This name must adhere to Azure naming guidelines and be distinct inside the Azure area
c. Select the Azure region in which you wish to set up your resource deployment
d. Next click on tags
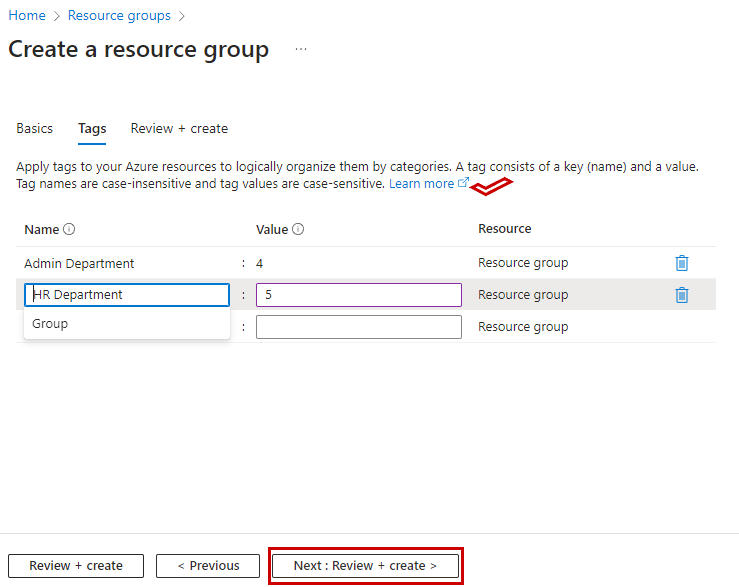
Step 5 : I tagged two departments of a company as an example
Note: The explanation ticked in the image below tells us what Tags are about
a. select "Review + Create" to go over your selections
Step 6 : Azure will verify your selections to make sure they adhere to specifications
a. Click Create
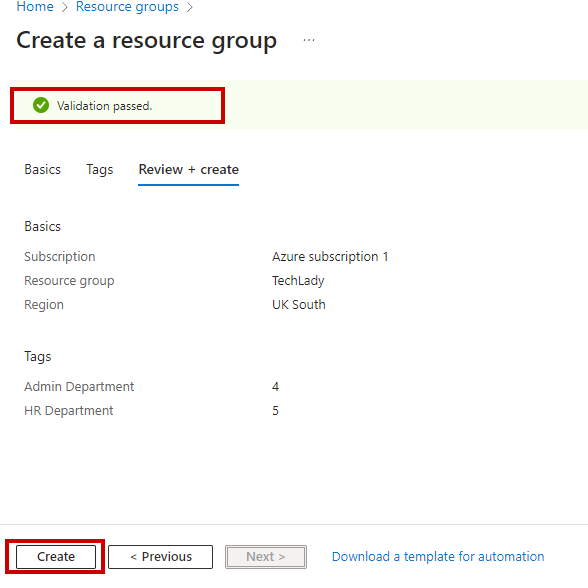
Your resource group will now start to be deployed by Azure
Congratulations on your successful Azure resource group. Now, you can start deploying resources like virtual machines, databases, web apps, etc.


