How to Extend a Data Disk and Initialize It on Your Windows Virtual Machine on Azure

To create a data disk and initialize it on your Windows Virtual Machine (VM) on Azure, you can follow these steps:
Step 1. Sign in to the Azure portal: Go to https://portal.azure.comand sign in with your Azure account credentials
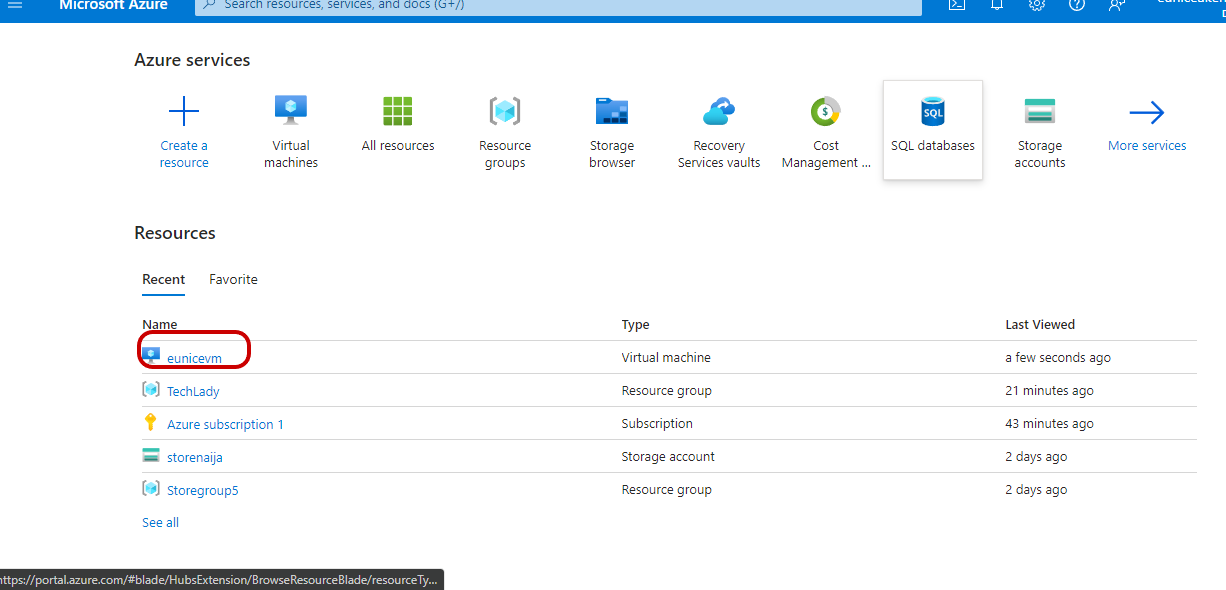
Step 2. Navigate to Virtual Machines: Once you're logged in, on the homepage of Azure portal Click on the Virtual Machine to which you want to add the data disk
"Click" "Virtual machine" Highlighted in the red box in the image below
Step 3. Add a Data Disk: In the Virtual Machine overview pane, "Click" on the "Disks" option in the Settings section
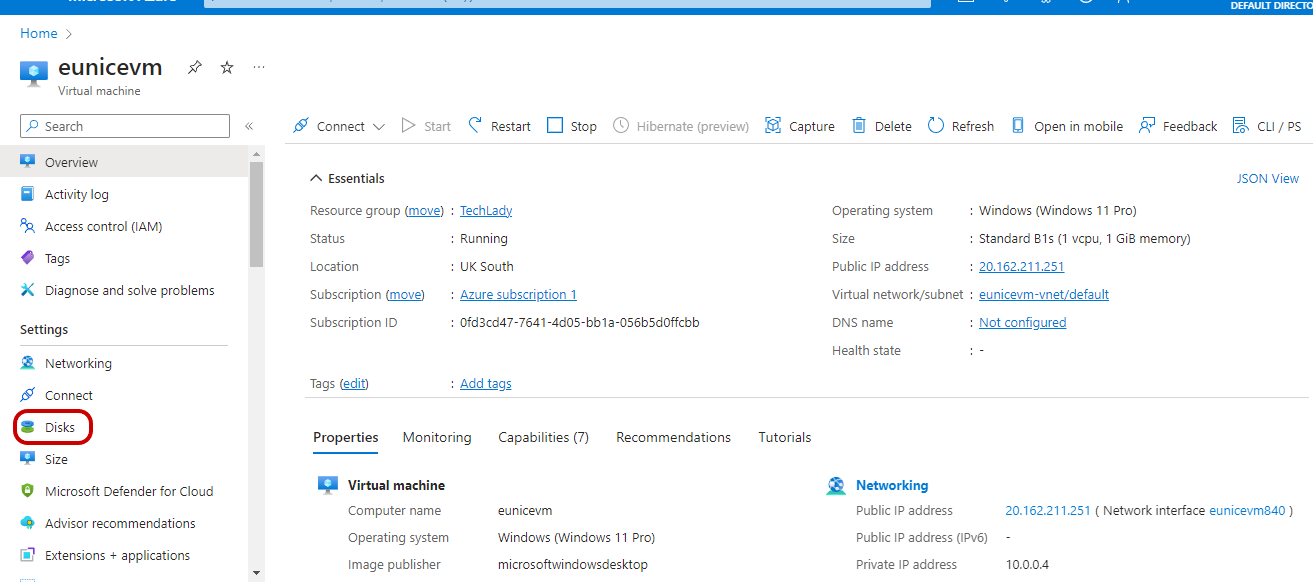
**a. "**Click on "+ Add data disk" on the left side of the page as shown below
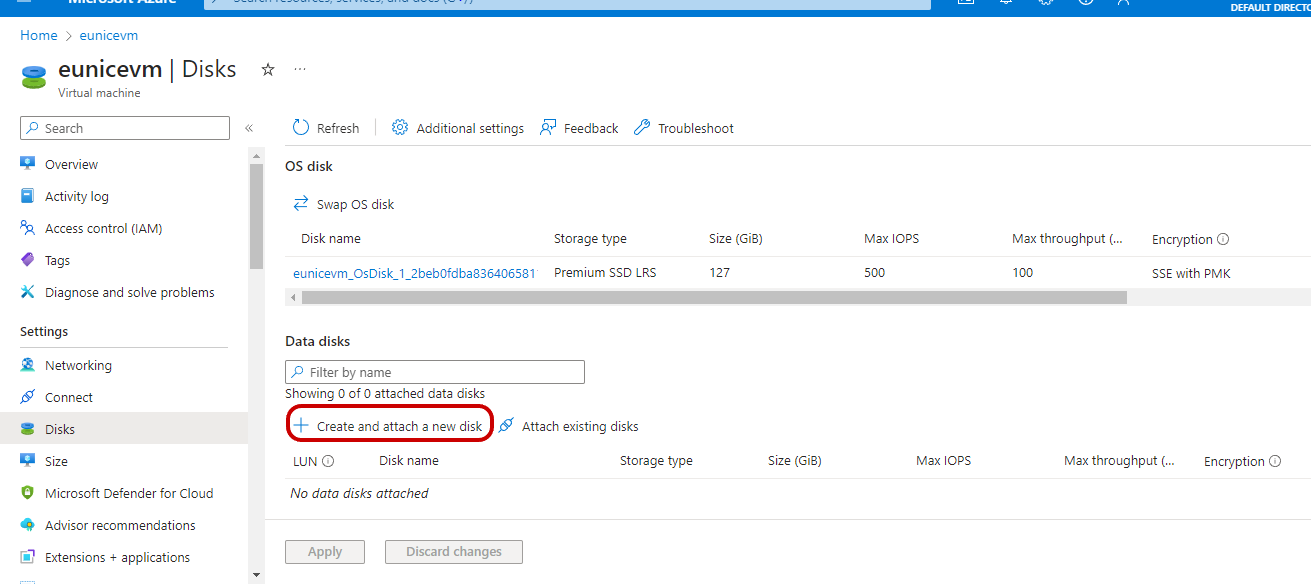
b. Specify the details for the new data disk, such as name, disk type (e.g., Standard HDD, Standard SSD, Premium SSD), size, and other settings as per your requirements
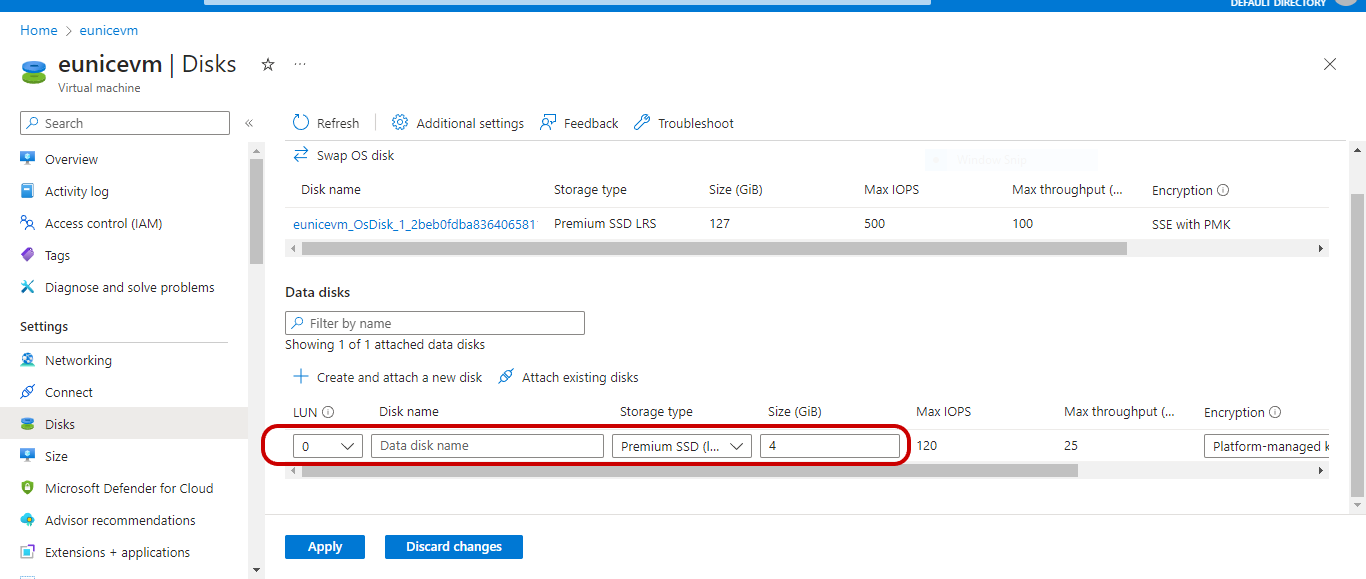
c. Note: It is important to know you cannot reduce the size of your Data disk
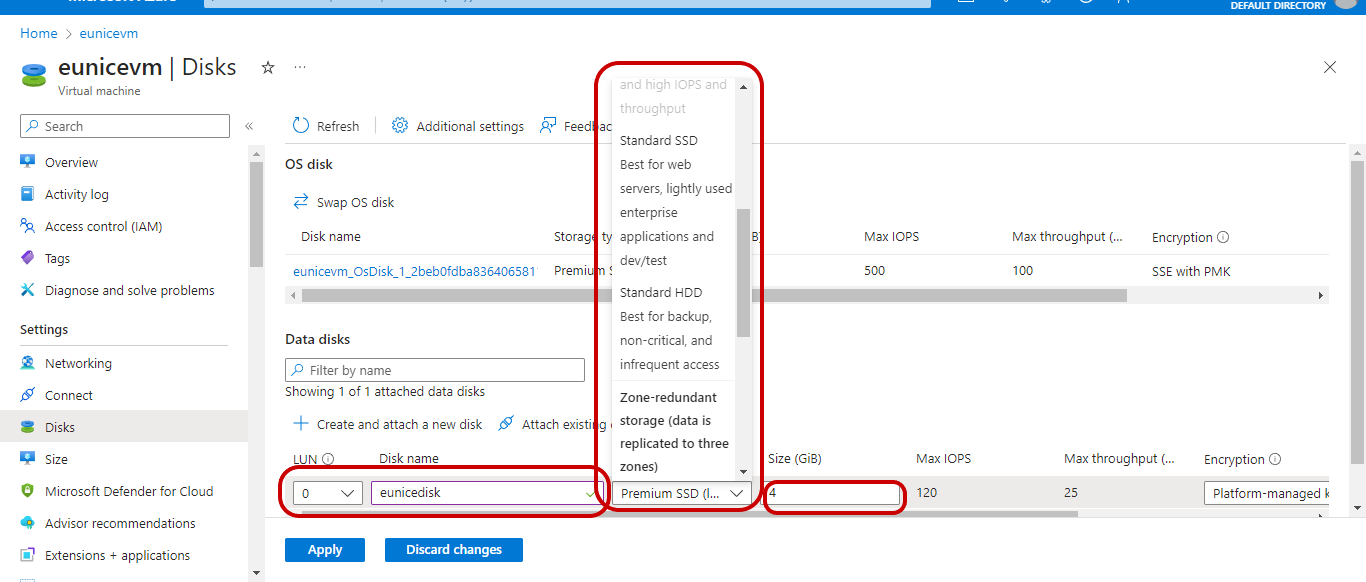
Give your Disk a" Disk name"
"Select" a " Disk type"
Pick a "Size" for your "Data disk"
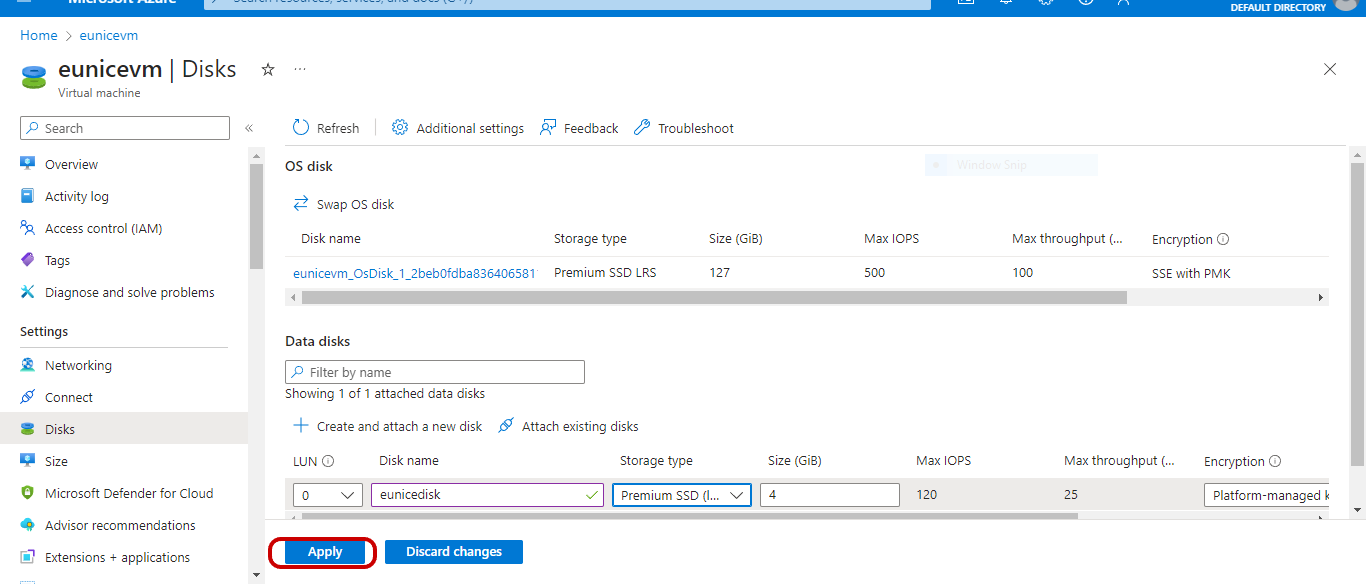
d. "Click on" "Apply"
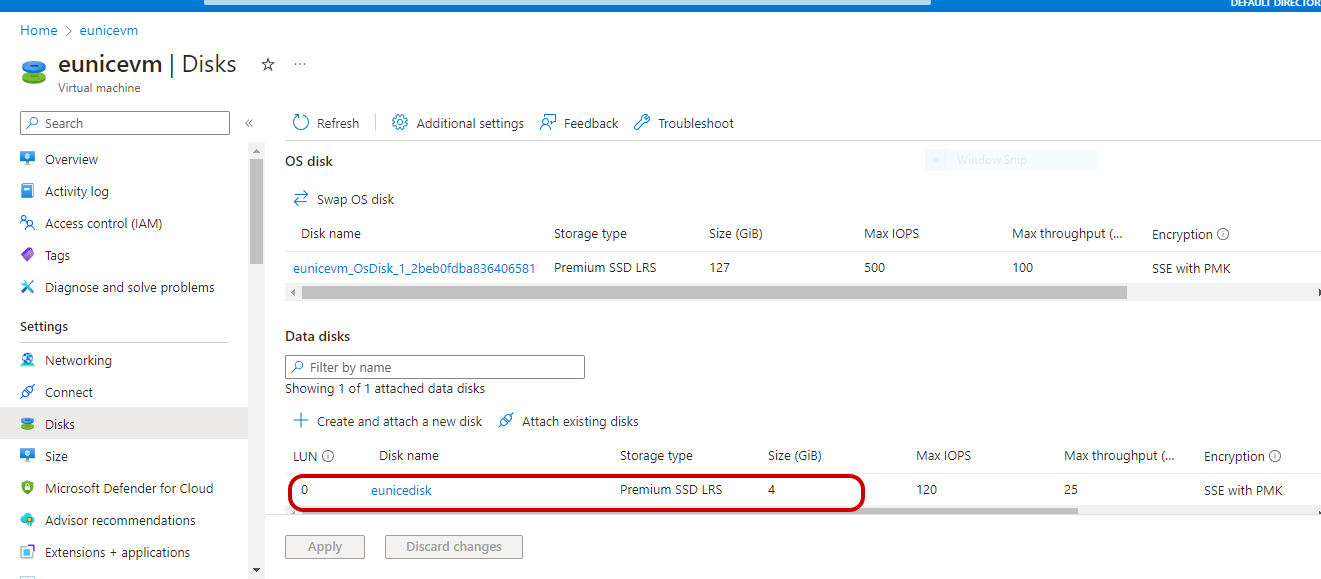
f. The Data Disk has been created as seen below
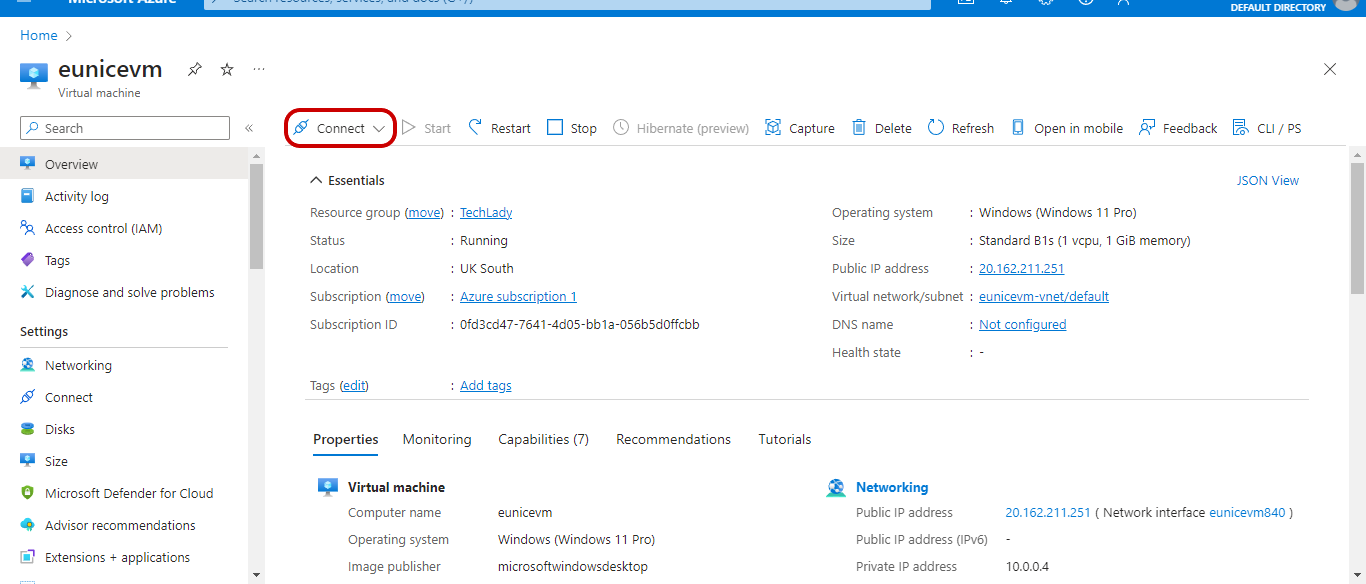
Step 4. Connect to the Virtual Machine: Once the data disk is added, connect to your Virtual Machine using Remote Desktop Protocol (RDP)
"Click on" "Connect"
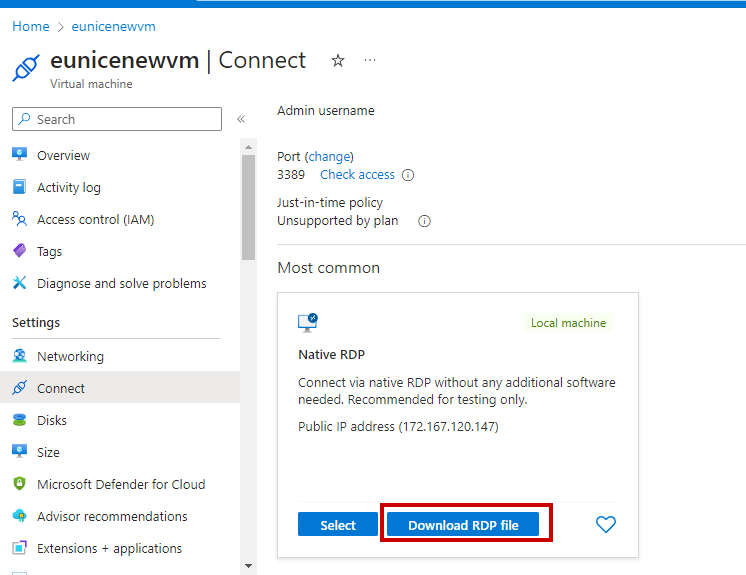
a. "Click on" "Download RDP"
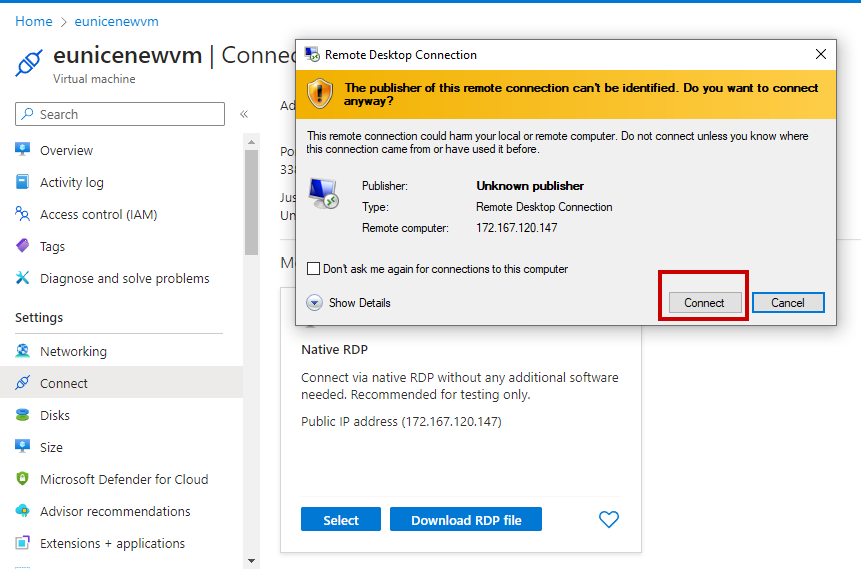
b. "Click on" "Connect"
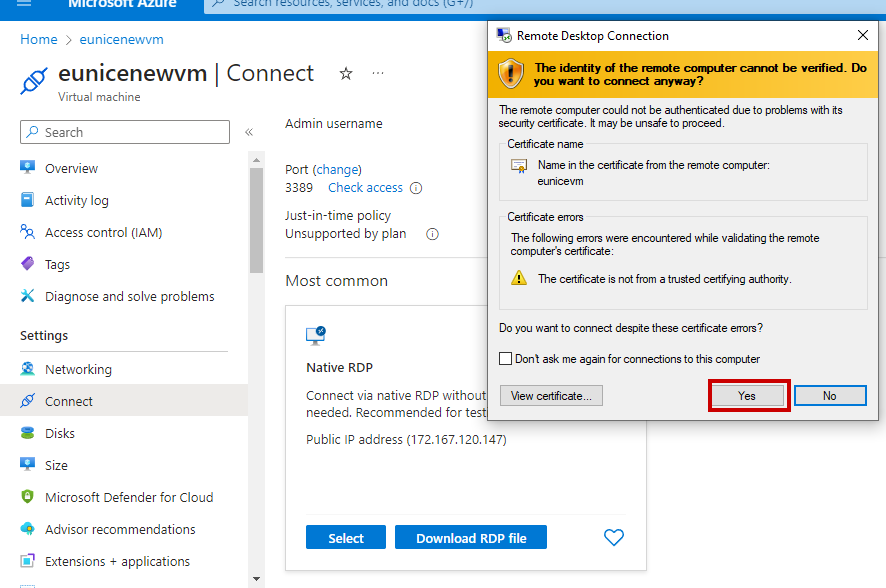
c. "Click on" "Yes"
d.
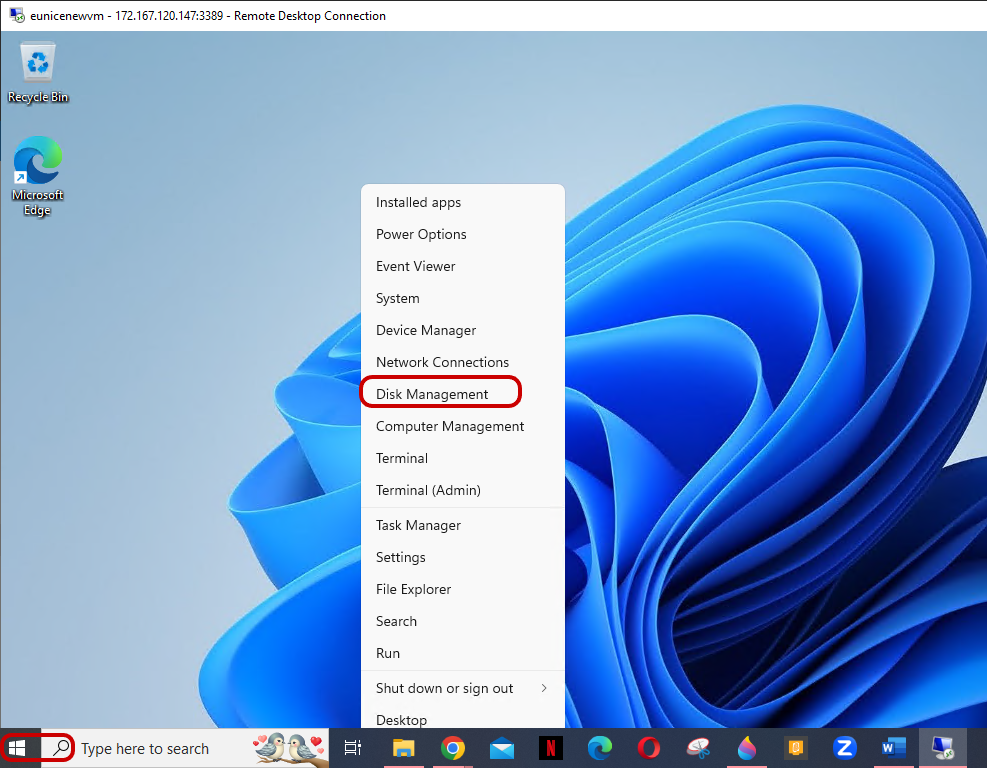
Step 5: Initialize the Disk: Once connected to the Virtual Machine, open Disk Management. You can do this by "right-clicking" on the Start button and selecting "Disk Management" from the menu
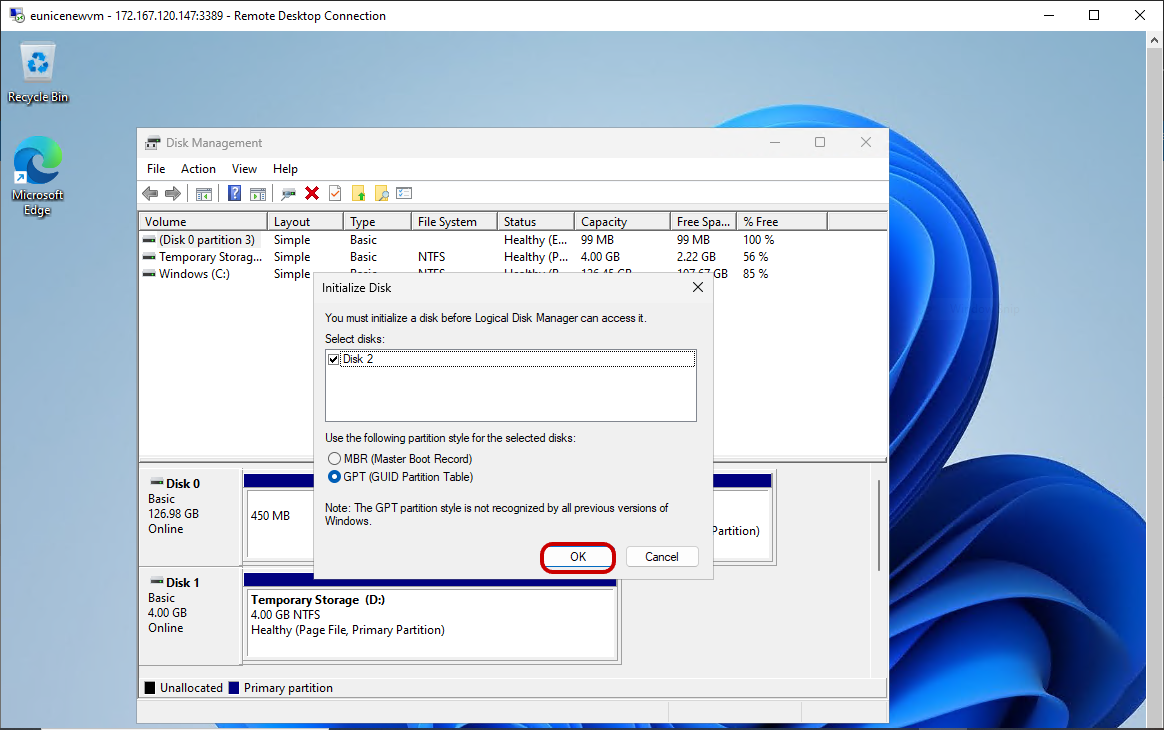
a. Initialize new Disk by "Clicking on" "OK" as the highlighted box below
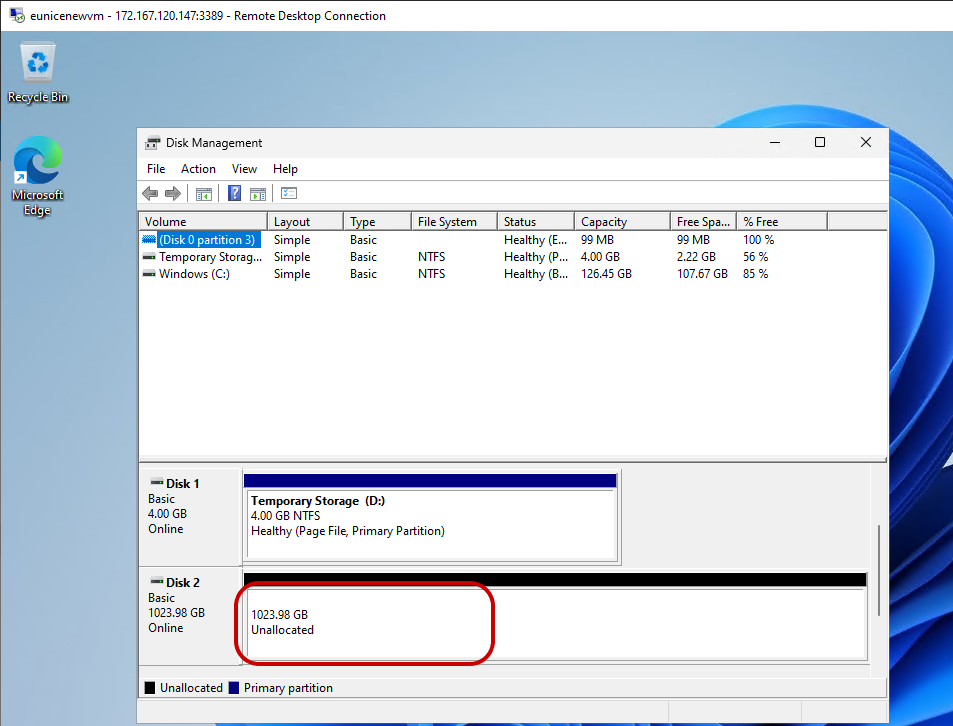
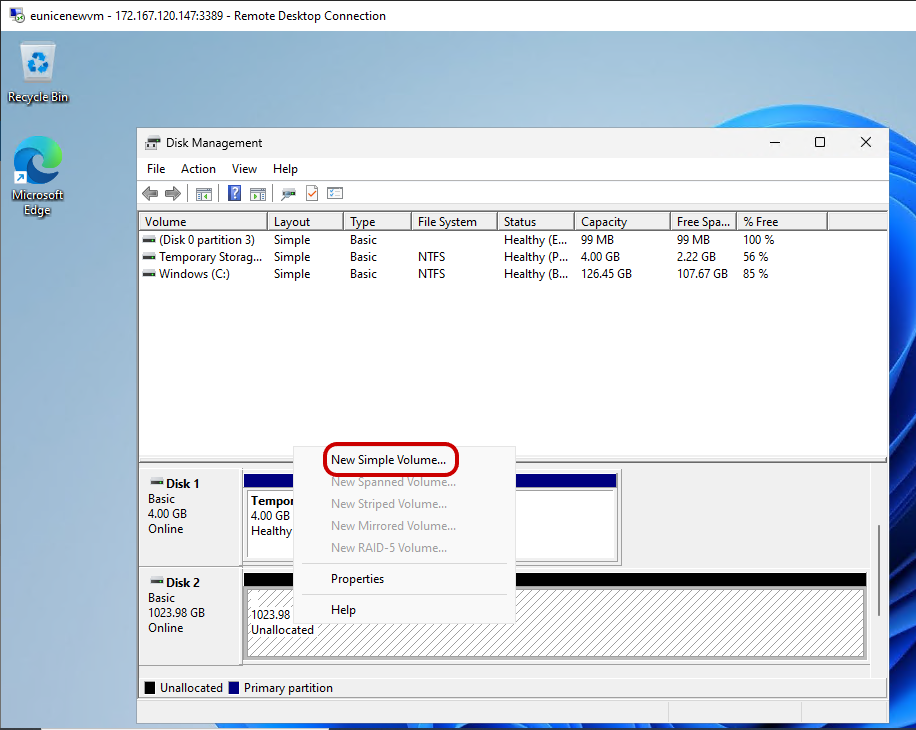
**b. "**Right-click on" the "unallocated space"
c. select "New Simple Volume"
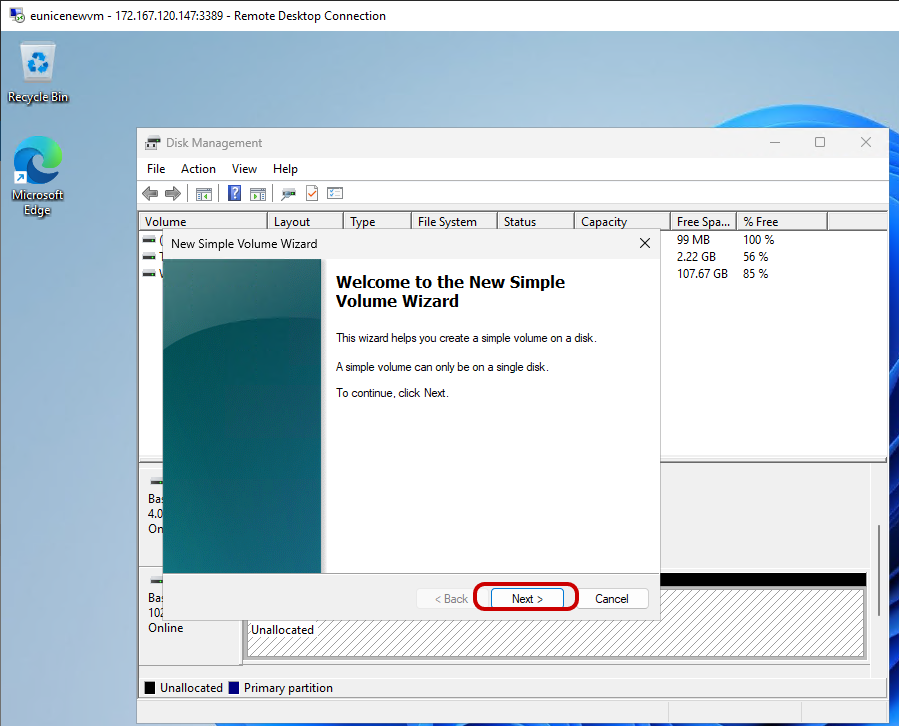
d. Follow the wizard to create a new volume assigning a drive letter, and formatting the volume with the desired file system (NTFS is typical for Windows) which are all as a default setting
"Click on" "Next"
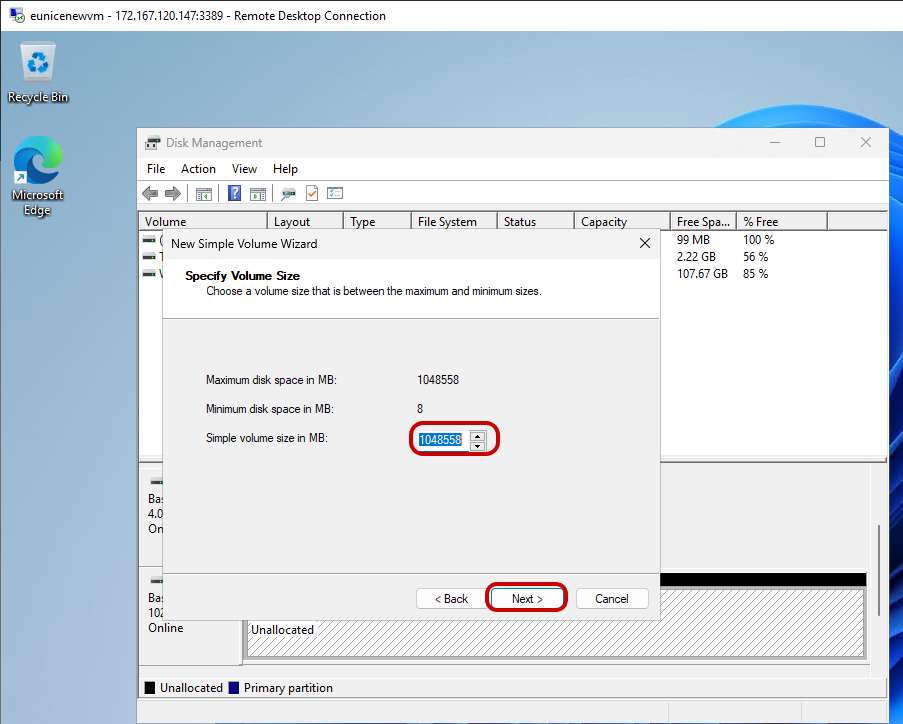
e. specifying the volume size as shown in the image
"Click on" "Next"
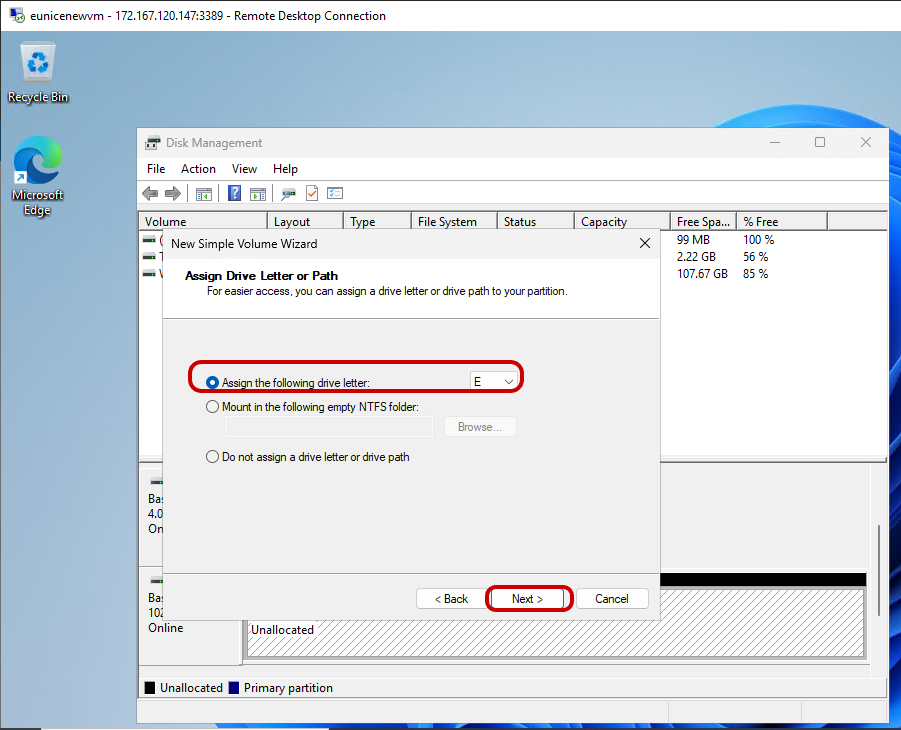
f. Assigning a drive letter
"Click on" "Next"
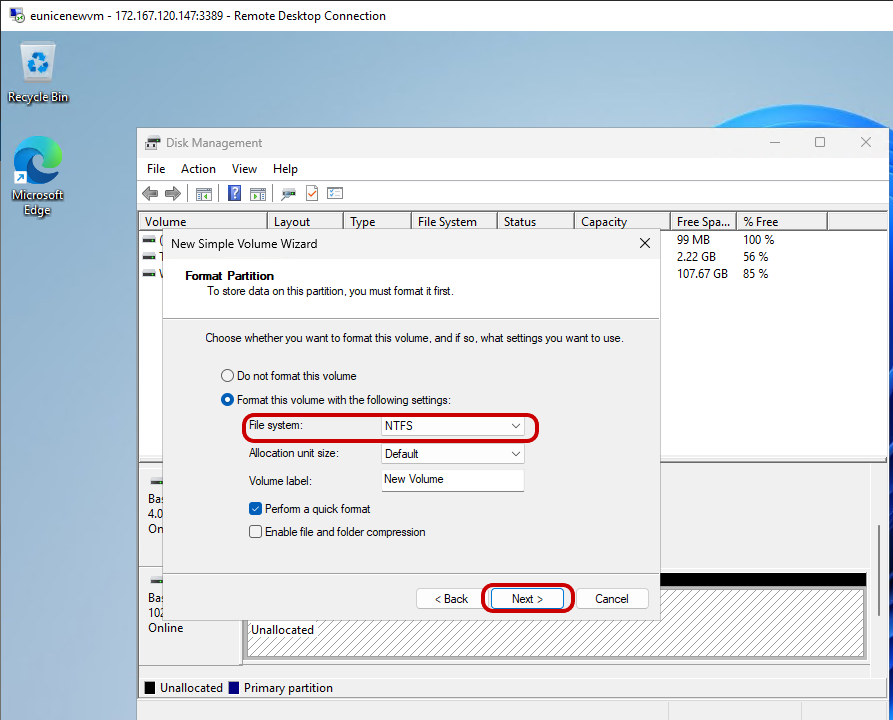
g. NTFS is typical for Windows
"Click on" "Next"
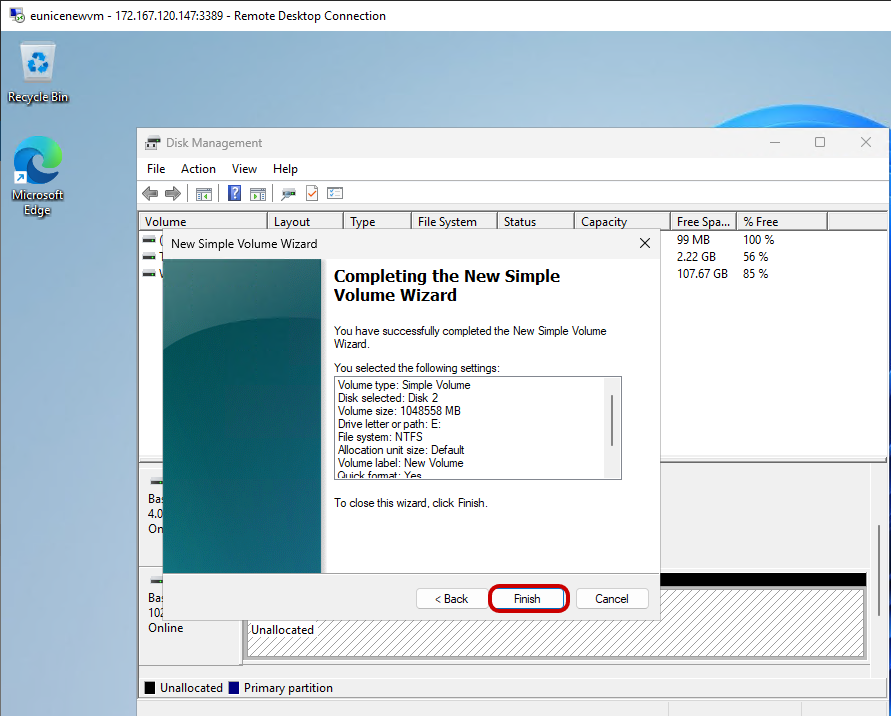
h. Complete the wizard, and the new volume will be created and accessible in Windows Explorer
"Click on" "Finish"
I. "Right click" on "New volume" highlighted in the red box below
j. "Click on" "Open"

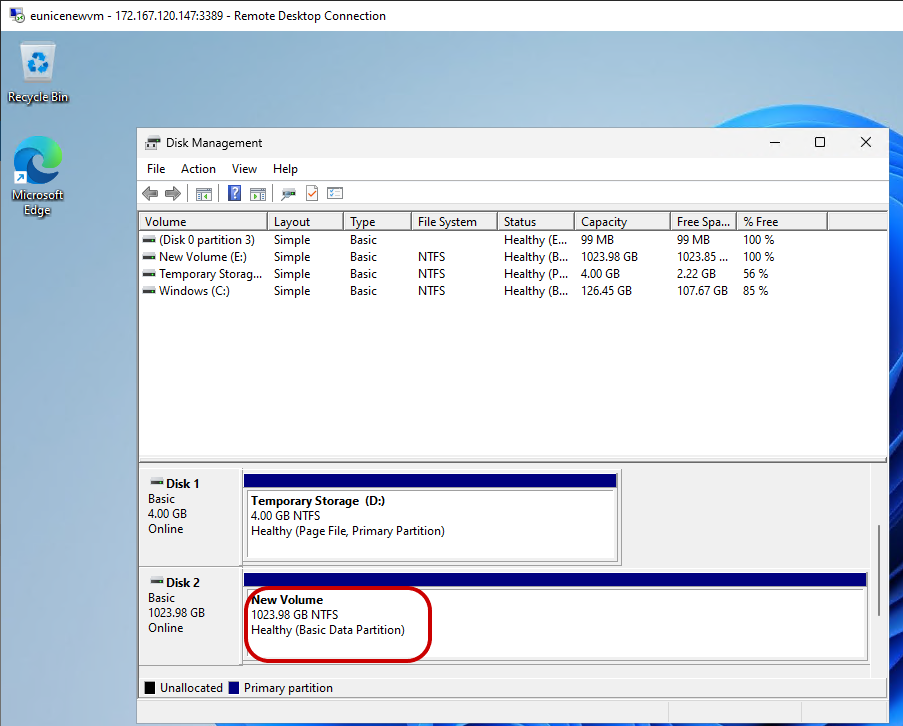
k. Once the volume is created, you can verify its availability and functionality by navigating to it in Windows Explorer and performing any necessary file operations
New Volume created and Initialized

Step 6. you can copy & paste your pictures, documents, folders from your computer on to your windows virtual machine
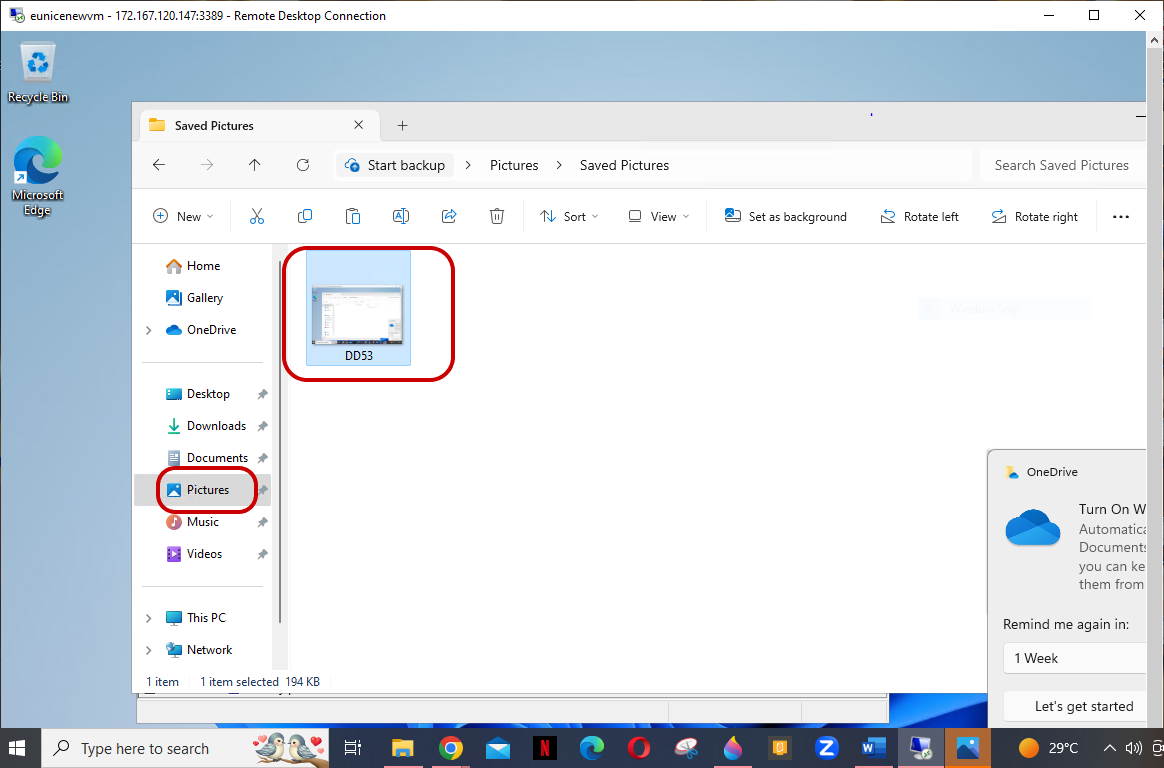
a. Explore the windows explorer