

Perquisites
An Azure account
An Azure Subscription
Introduction
As the demand for scalable and dependable data storage solutions grows, cloud databases are becoming an increasingly popular option for businesses all over the world. Microsoft's fully managed relational database service, Azure SQL Database, provides a comprehensive platform for building, deploying, and maintaining cloud-based applications.
We will walk you through the process of building a SQL database in Azure in this step-by-step tutorial. Regardless of your level of experience with cloud computing, this lesson will equip you with the fundamental skills needed to set up your database effectively.
Steps In Creating A Database
1: Log into Azure Portal- The first step is to sign in to the Azure portal using your Azure account credentials. If you don't have an account, you can sign up for a free Azure trial
2: Use the search box on the homepage to look for sql database
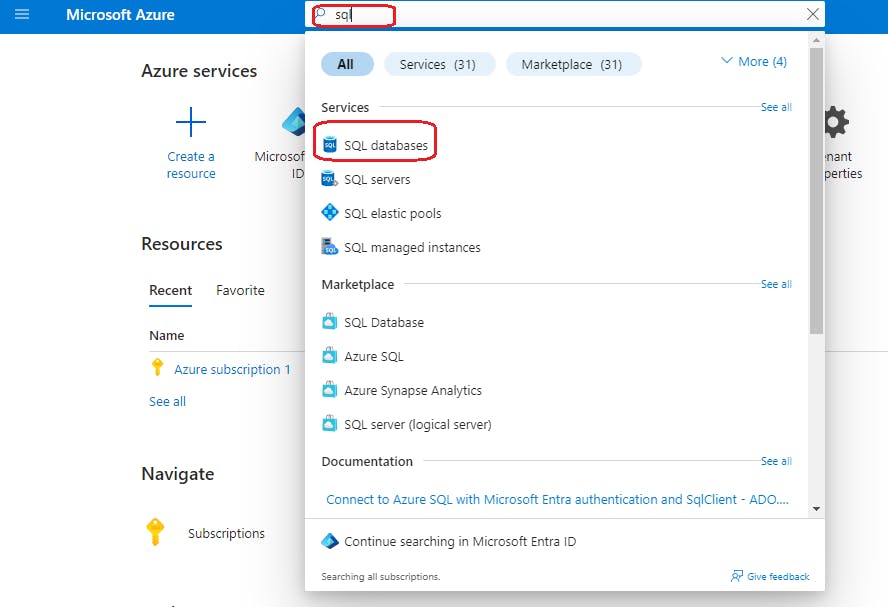
3: "Click On" "Create"

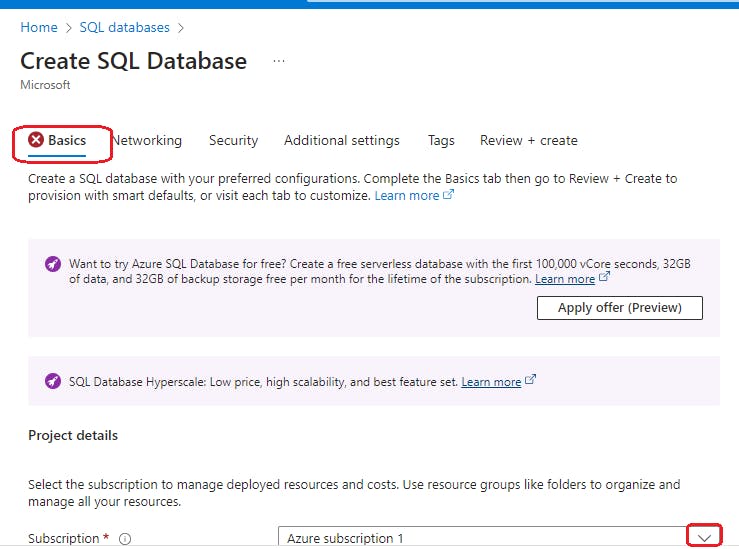
4. Fill in Basic Settings Information Choose your "Subscription"
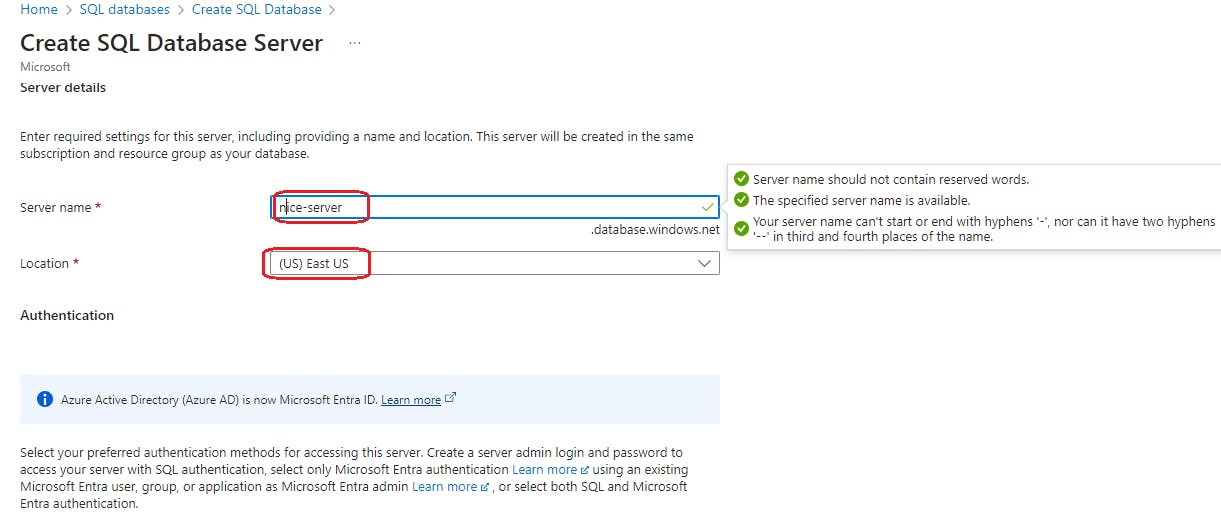
5: Server Name: Give your server a "Name" and Select a location from the dropdown list "Select" a "Location"
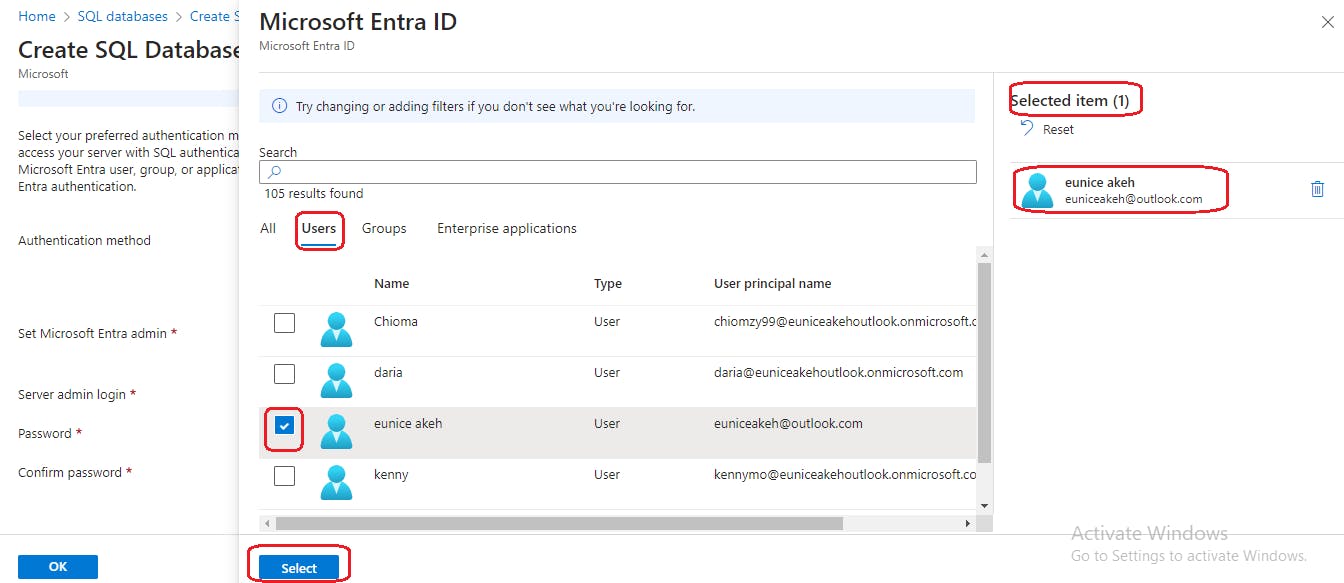
6: Choose preferred Authentication Method - "Select" "Use both sql and Microsoft Entra authentication" and the "Click On" "Set admin"

7. Select Admin - Set admin opens this prompt " Click On" the "User" and the "Click On" "Select"
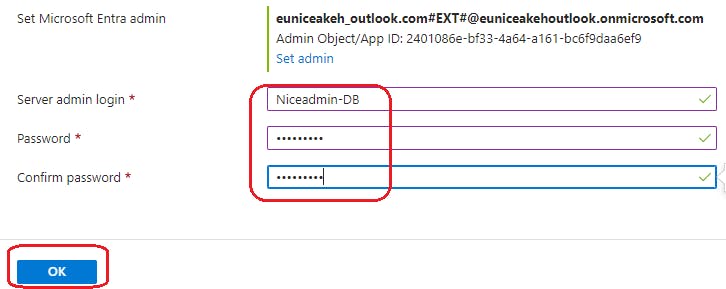
8. Server admin login: Enter a "username" for the SQL authentication server admin Enter a "password" and enter it again in the "Confirm password" field
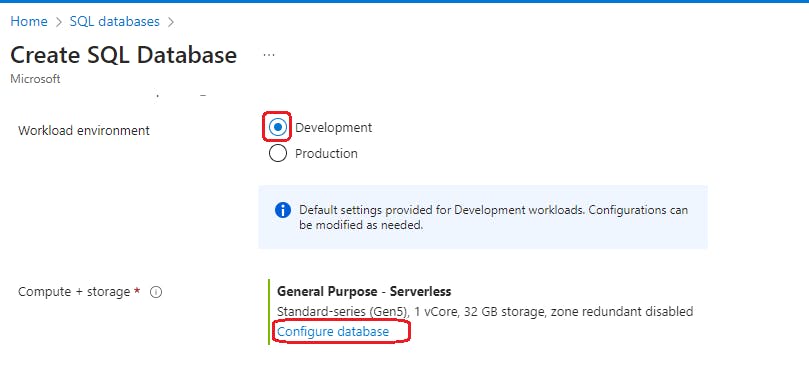
- Select Workload Environment and Configure Compute + storage: Choose and "Tick" "Development" "Click On" "Configure database"
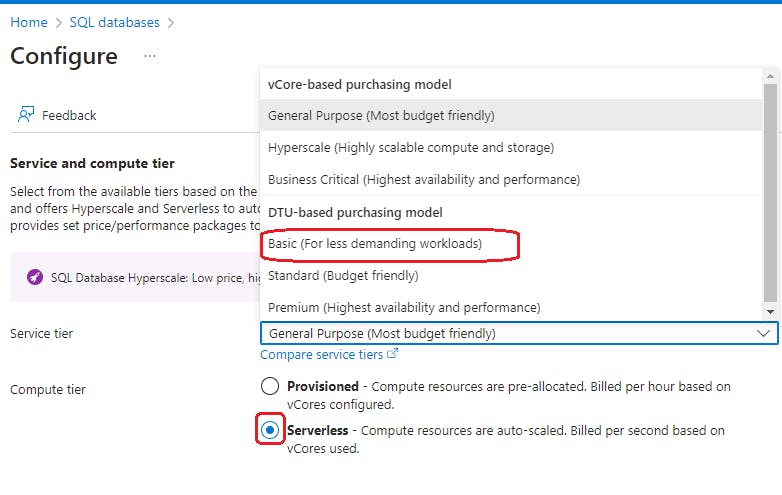
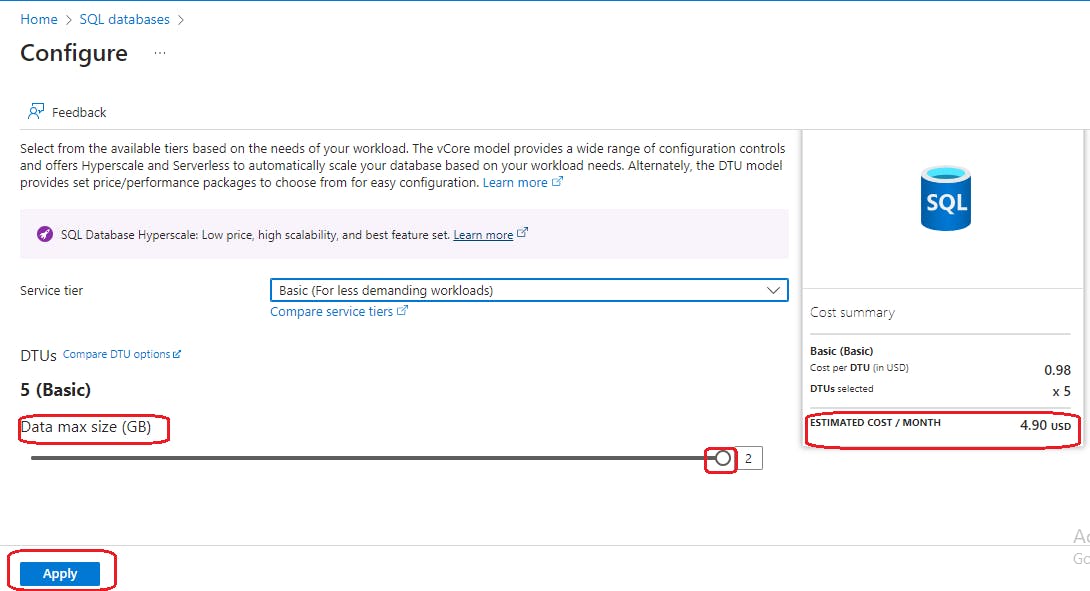
- Configure Service and Compute Tier : Select Tier based on your needs "Select" "Basic(For less demanding workloads) and "Tick" "Serverless"
10a. Select Data max size : Pull to desired size and on the left side of the page review your estimated monthly cost of your extra data . "Click On" "Apply"
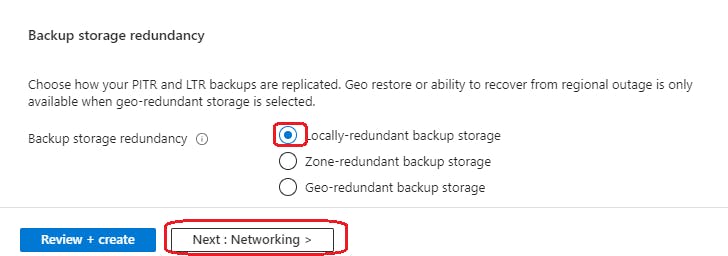
"Select" "Backup storage redundancy" and then "Click On" "Next: Networking "
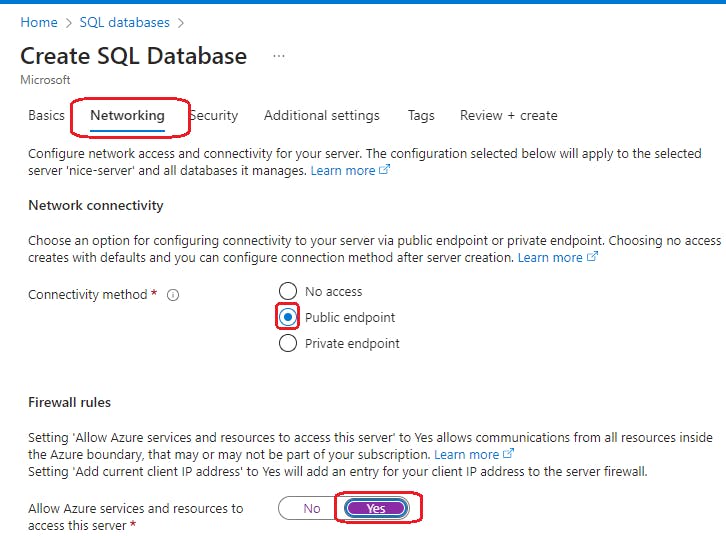
On the Networking Settings, set connectivity to "Public" and for Firewall rules, set Allow Azure services and resources to access this server "Tick" "Yes"
- Set Add current client IP address to "Yes" and Leave other options as default then "Click On" "Next: Security"
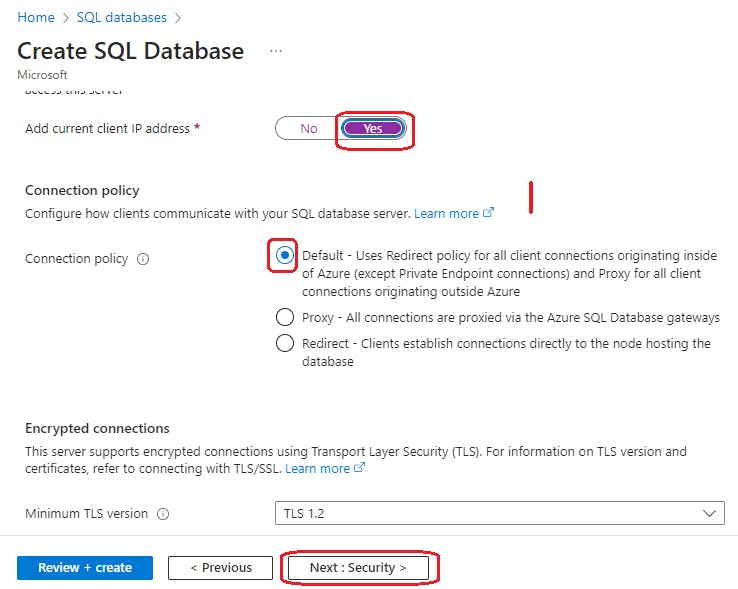
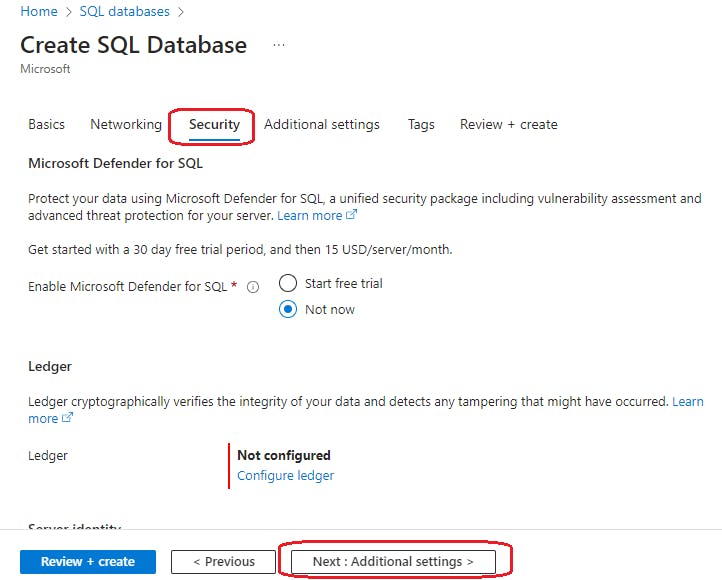
- On the Security Settings tab leave as default, "Click On" "Next: Additional settings"
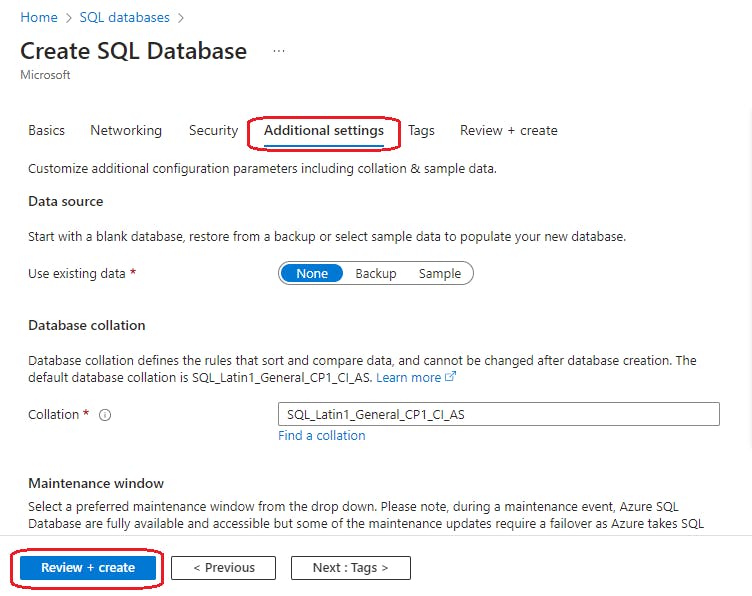
15. On the Additional Settings tab, under Data source section, for Use existing data, you have options to use an existing database: left it at "None" next "Click On" "Review + create"
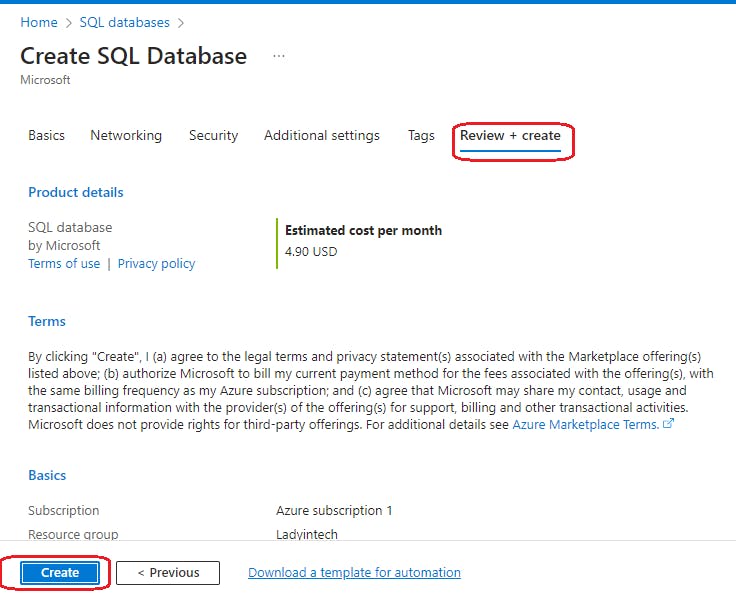
- On the Review + create settings "Click On" "Create"
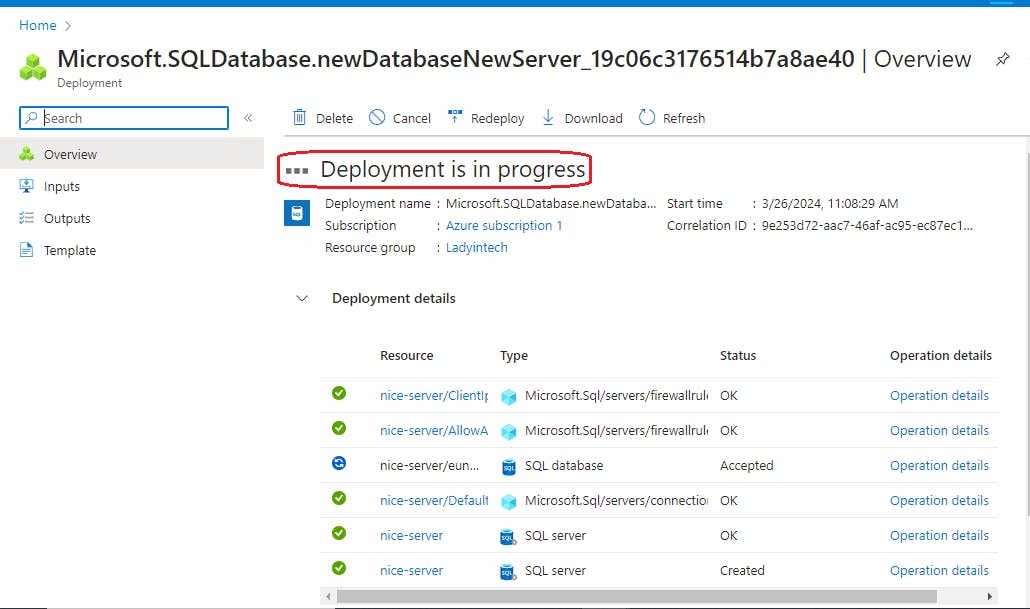
- Deployment is in progress
- Deployment Complete, "Click On" "Go to resource"
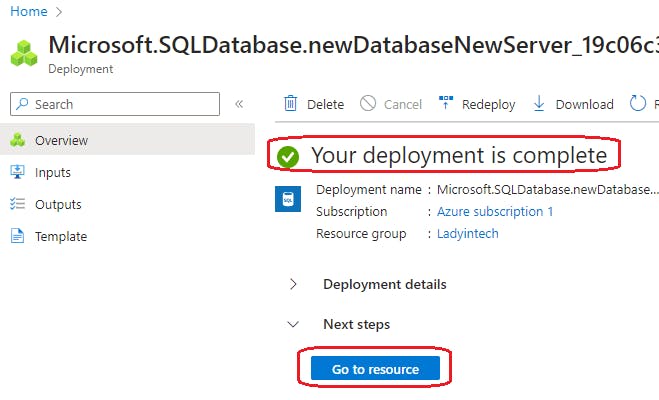
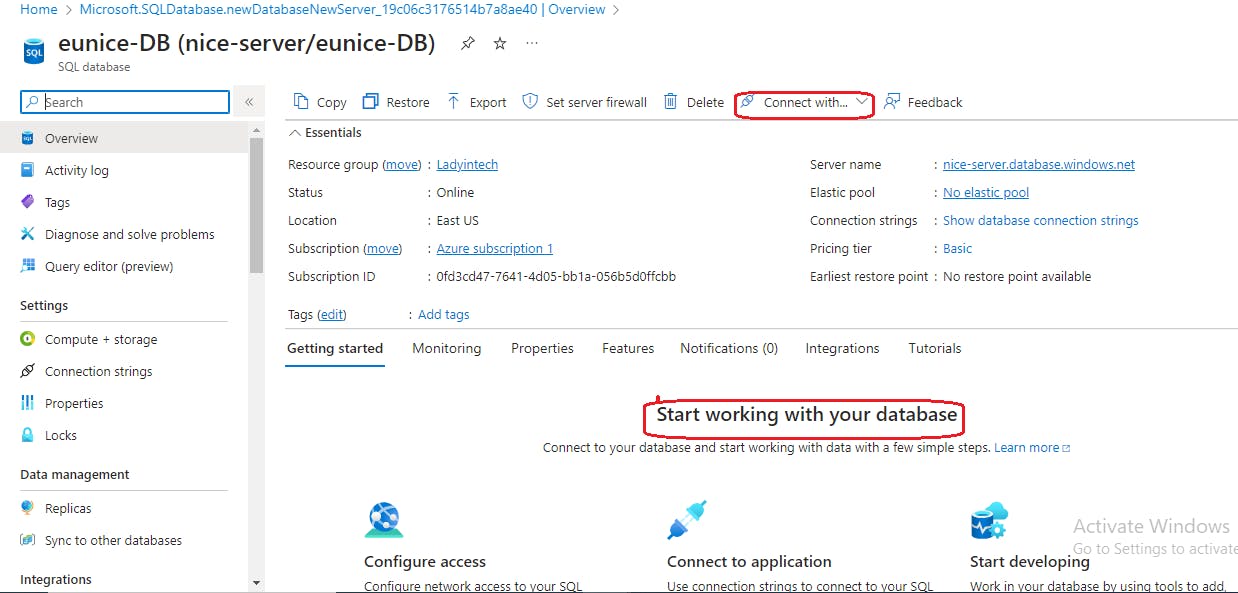
Access Your Database
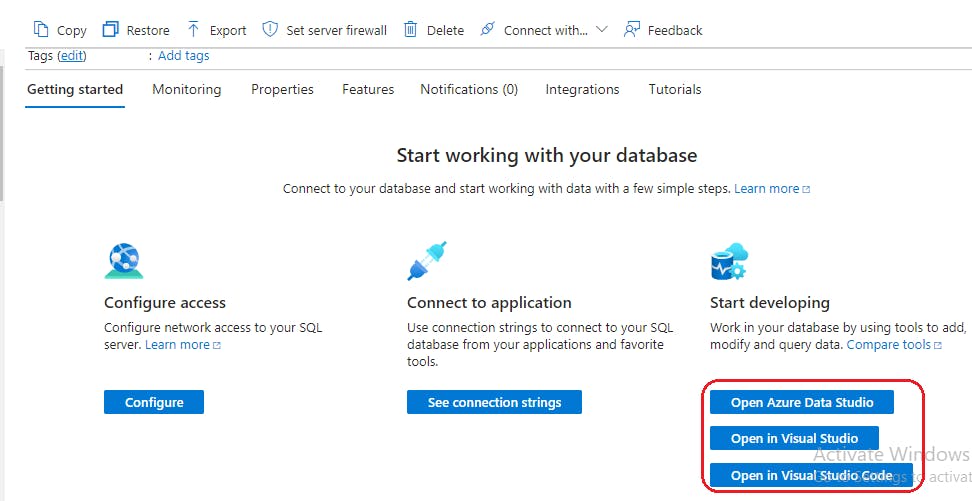
Once the database is successfully created, you can access it through the Azure portal or any SQL Server management tool such as SQL Server Management Studio (SSMS). Use the connection strings provided in the Azure portal to establish a connection to your database.
- For developers you can use any of tools to query your data
Conclusion
A strong and adaptable option for managing relational databases in the cloud is provided by Azure SQL Database. You can quickly establish and configure a SQL database on Azure by following the above step-by-step guide, which will allow you to store and analyze your data with simplicity. Regardless of the size of your enterprise workload or small application, Azure SQL Database offers the scalability, security, and performance you need to fulfill your business objectives. I'll be talking about querying data with SSMS and migrating that data to an Azure SQL Database, how to use Azure Data Studio in my upcoming blog post.