Host A Basic Static Website In Azure Blob Storage

Introduction
Static websites are pre-made and provided to users just as they are. They are made comprised of static assets like HTML, CSS, and JavaScript files that are kept on a web server and sent to the user's browser when needed.
The speed of static websites is one of their main benefits. Because static sites don't require server-side processing, they load quickly and offer a seamless browsing experience to users.
Static websites are also attractive due to their ease of use and security. Static sites require less setup and upkeep because they don't require a database or backend infrastructure.
Static websites are also very affordable and scalable. They are best suited for content that doesn't change frequently , like that found on blogs, portfolios, documents, and marketing websites.
Requirements
This tutorial uses Visual Studio Code, a free tool for programmers, to build the static website and deploy it to an Azure Storage account.
Download VSCODE https://code.visualstudio.com/download
Launch Visual studio code and Install the Azure Subscription extension
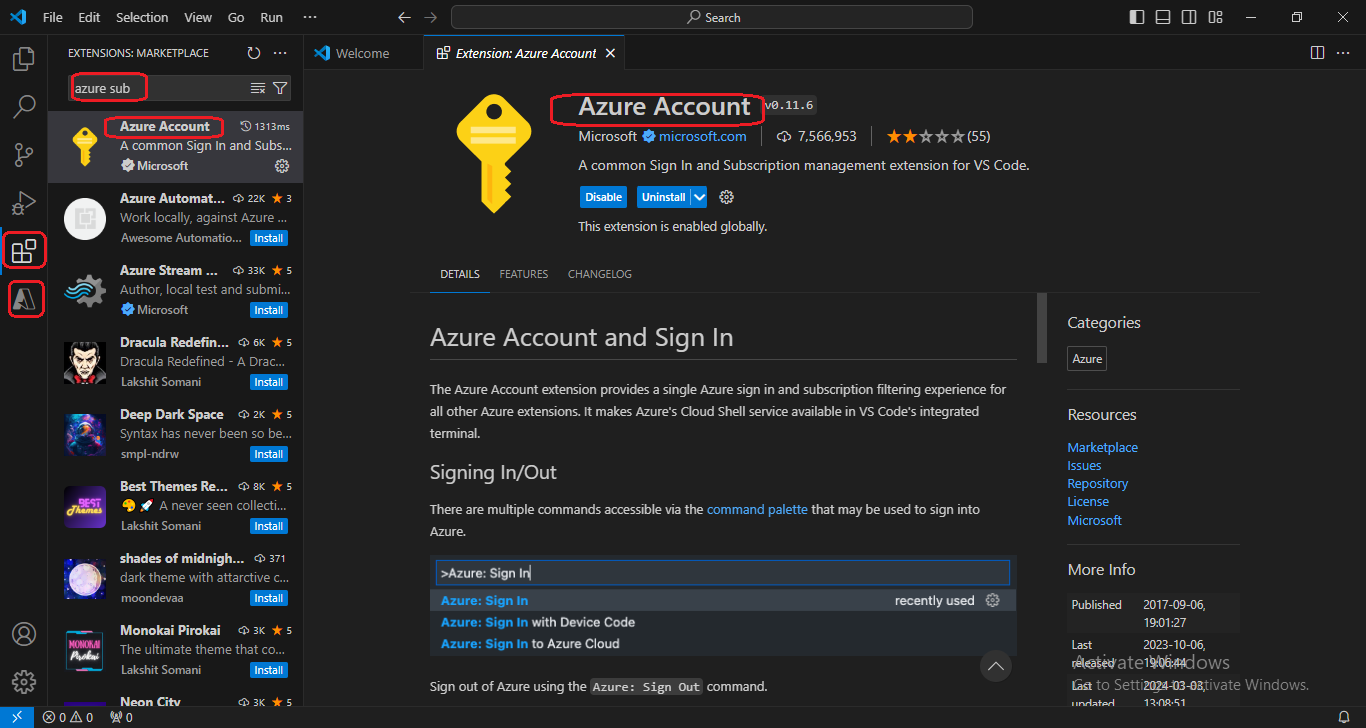
On the toolbar, click Extensions. Search for Azure Account , and select the Azure Account extension from the list. Then click the Install button to install the extension.
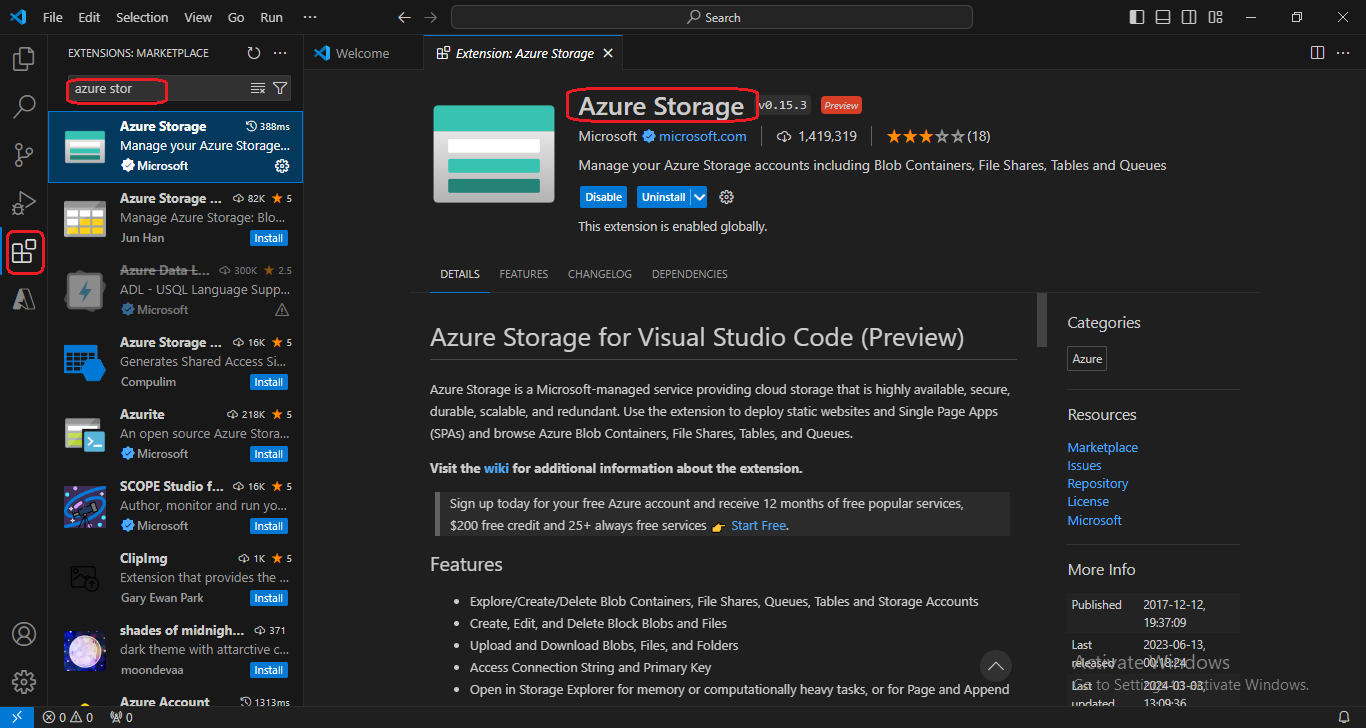
click Extensions. Search for Azure Storage , and select the Azure Storage extension from the list. Then click the Install button to install the extension.
Go to Azure portal and create a storage account refer to the link as a guide, https://hashnode.com/edit/clsutp9i200050ajo65yh2cgn
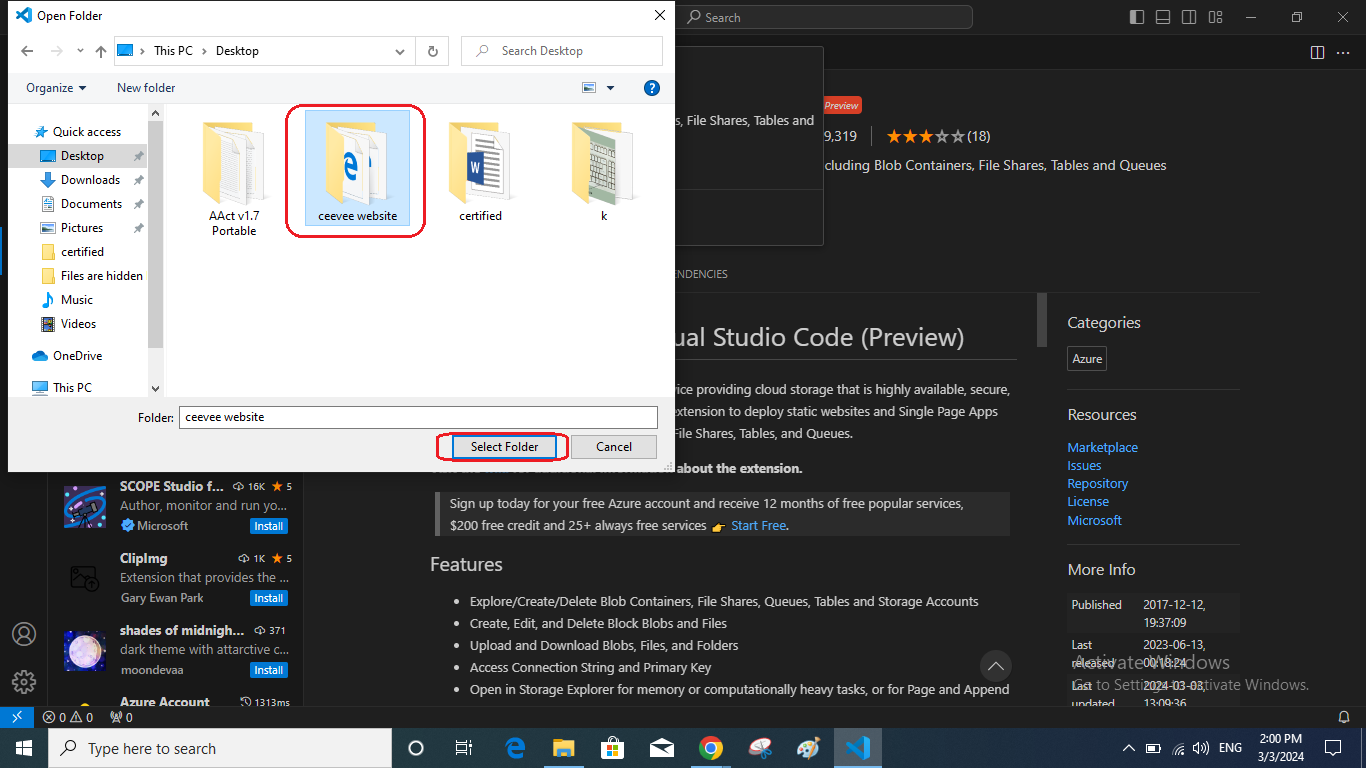
Create a folder on your local machine ,upload and save your static website data. Named my folder "Ceevee Website"
Configure Static Website Settings
a. Sign into Azure Portal
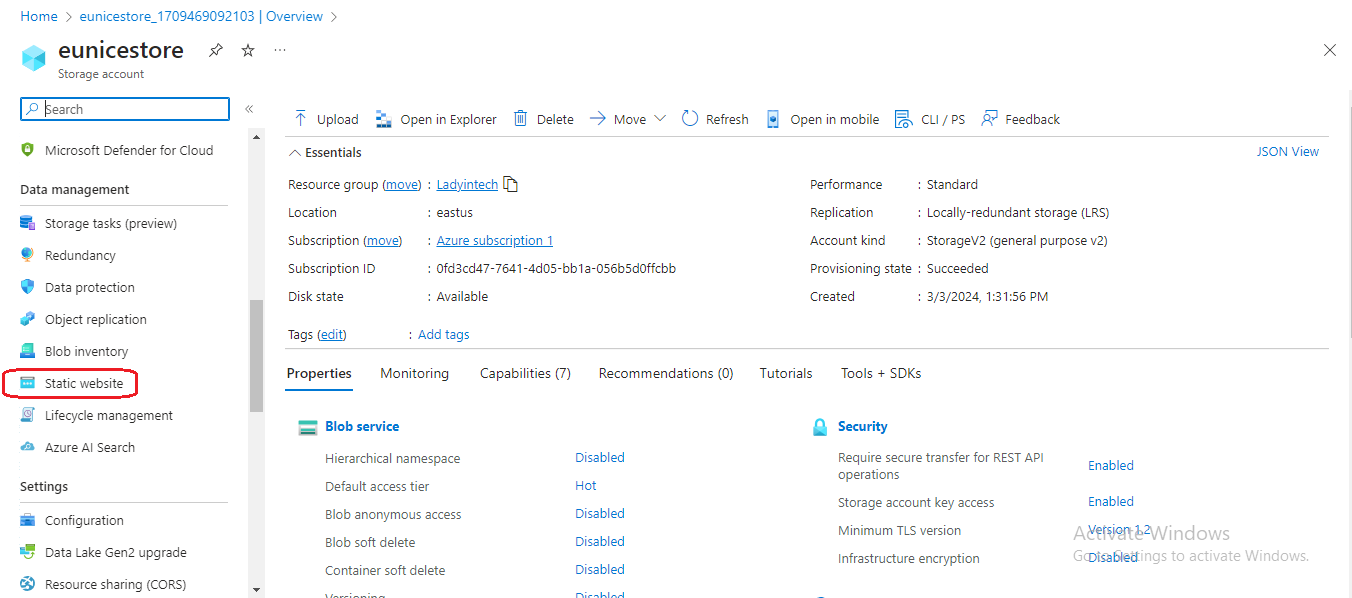
b. In the storage account overview, select "Static website" from the menu
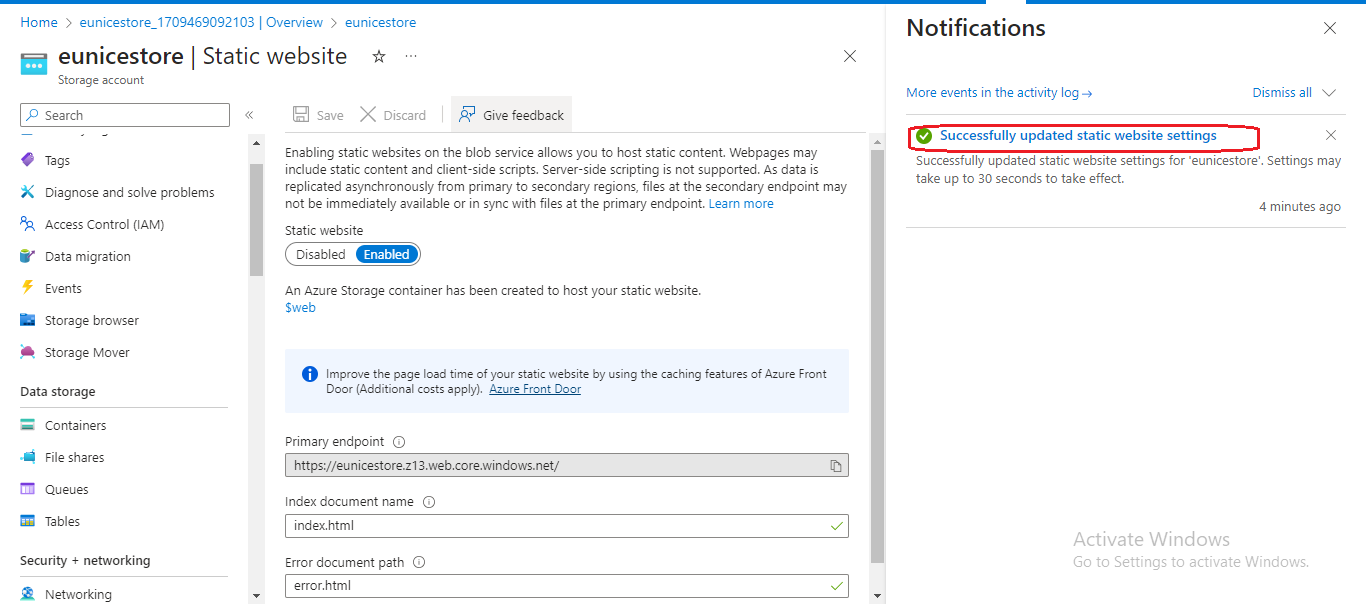
c. Select Enabled to enable static website hosting for the storage account
In the Index document name field, specify a default index page of index.html. When a user accesses the root of your static website, the default index page appears. .
In the Error document path field, specify a default error page of error.html. When a user tries to access a page that doesn't exist on your static website, the default error page appears.
Click Save. The Azure portal now displays your static website endpoint

Saved Successfully
Deploy Website Content using Visual Studio Code
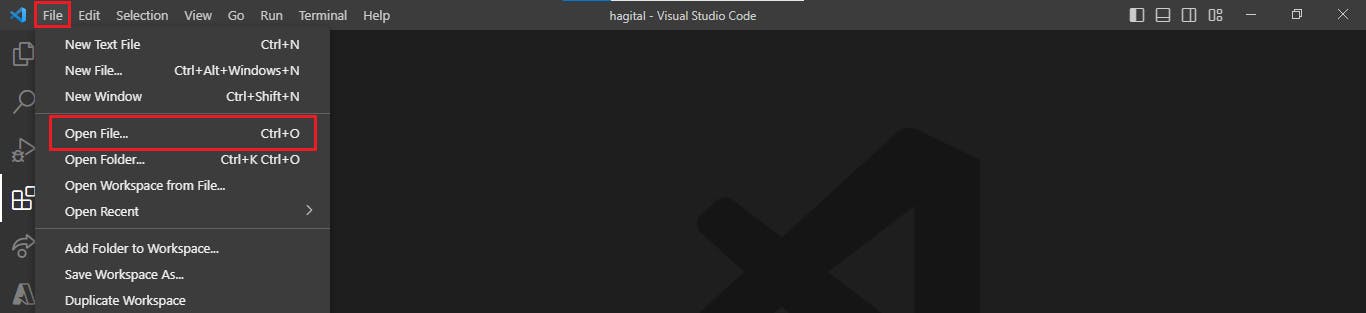
6a. Launch Visual Studio Code , "Click On" "File"
"Click On" "Open File"
b. Attach your saved folder containing your static website data as shown below
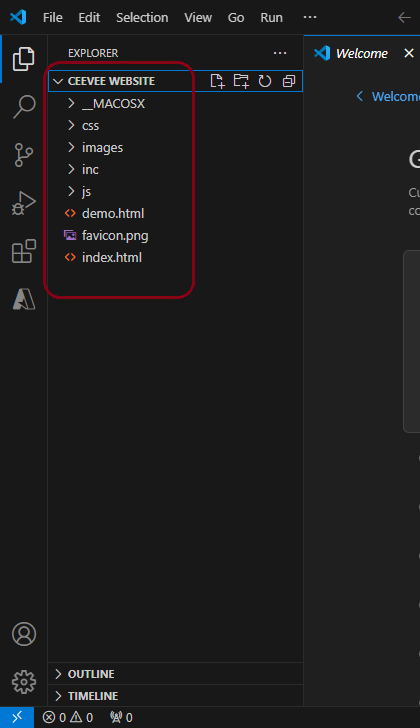
c. Uploaded website content
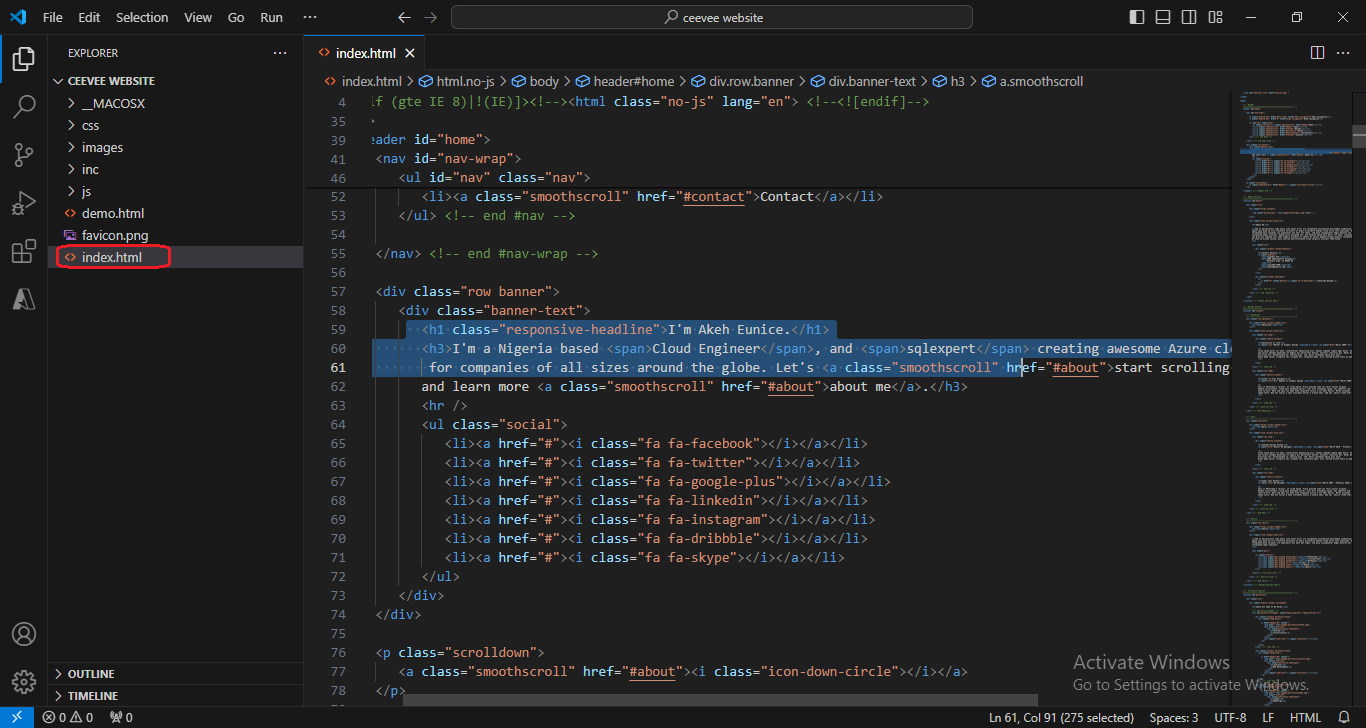
d. "Click On" "index.html"
e. You will be prompted to log in to Azure from your VSCode to retrieve a list of subscriptions. On the left side search for Azure Subscription and "Click On" "Azure Subscription".

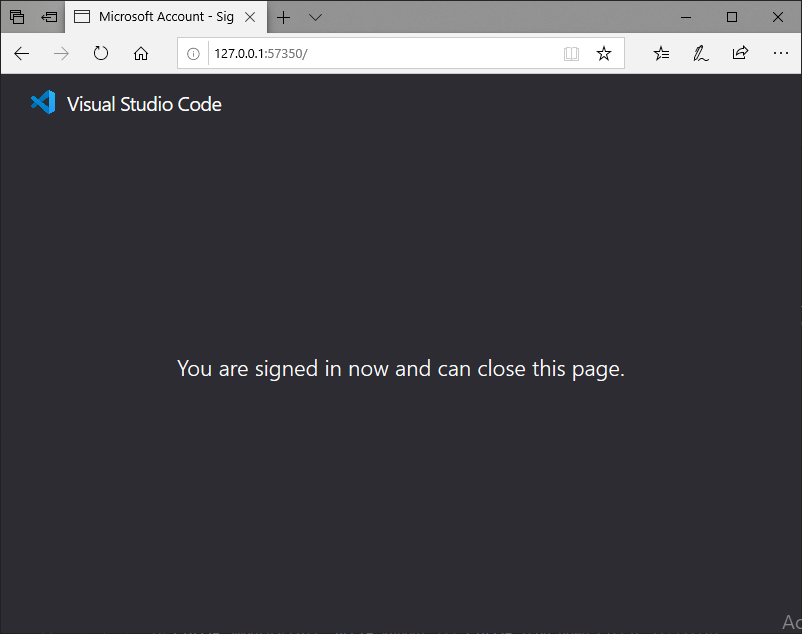
f. Fill in your details and "Click On" "Sign In"

g. Successfully signed In.
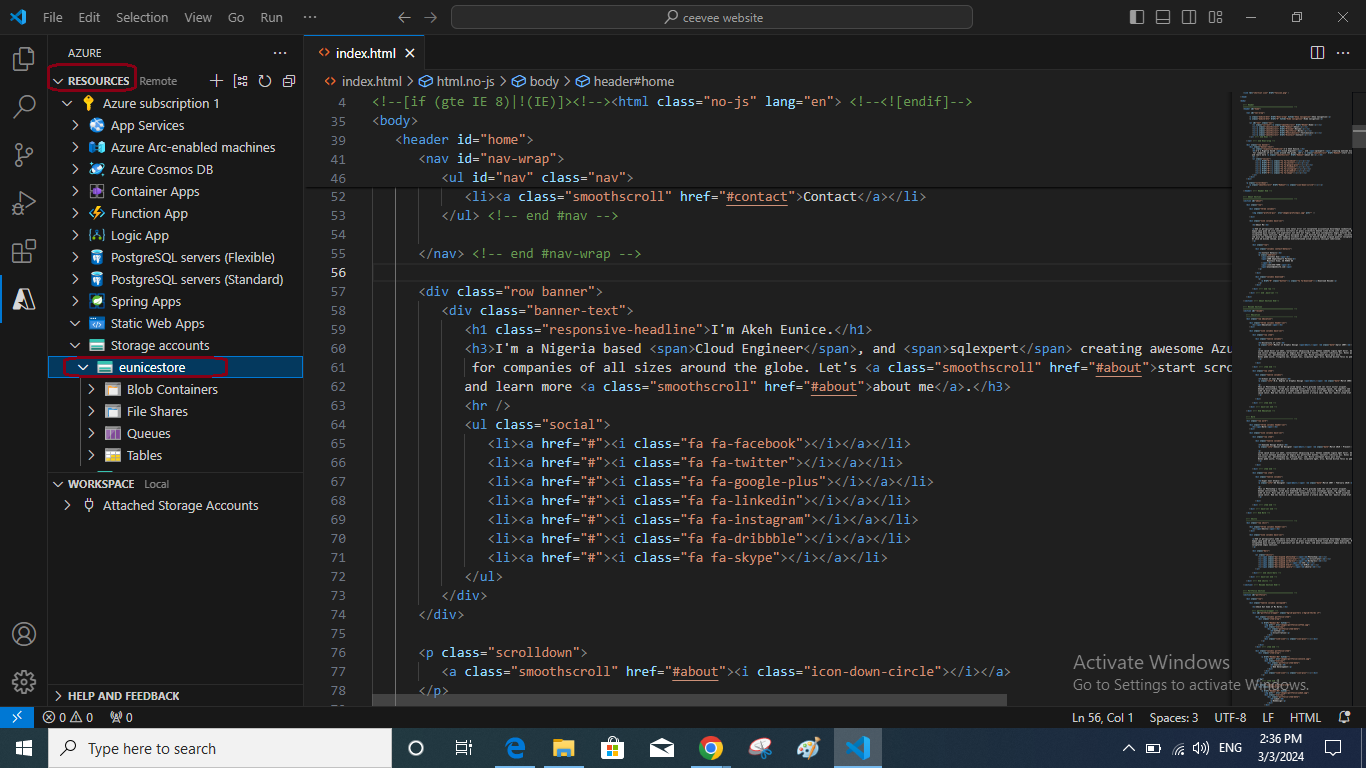
h. You will see the storage account you created in the Azure Portal on the explorer panel, right-click on it. "Click on" "Deploy to the static website via Azure Storage"
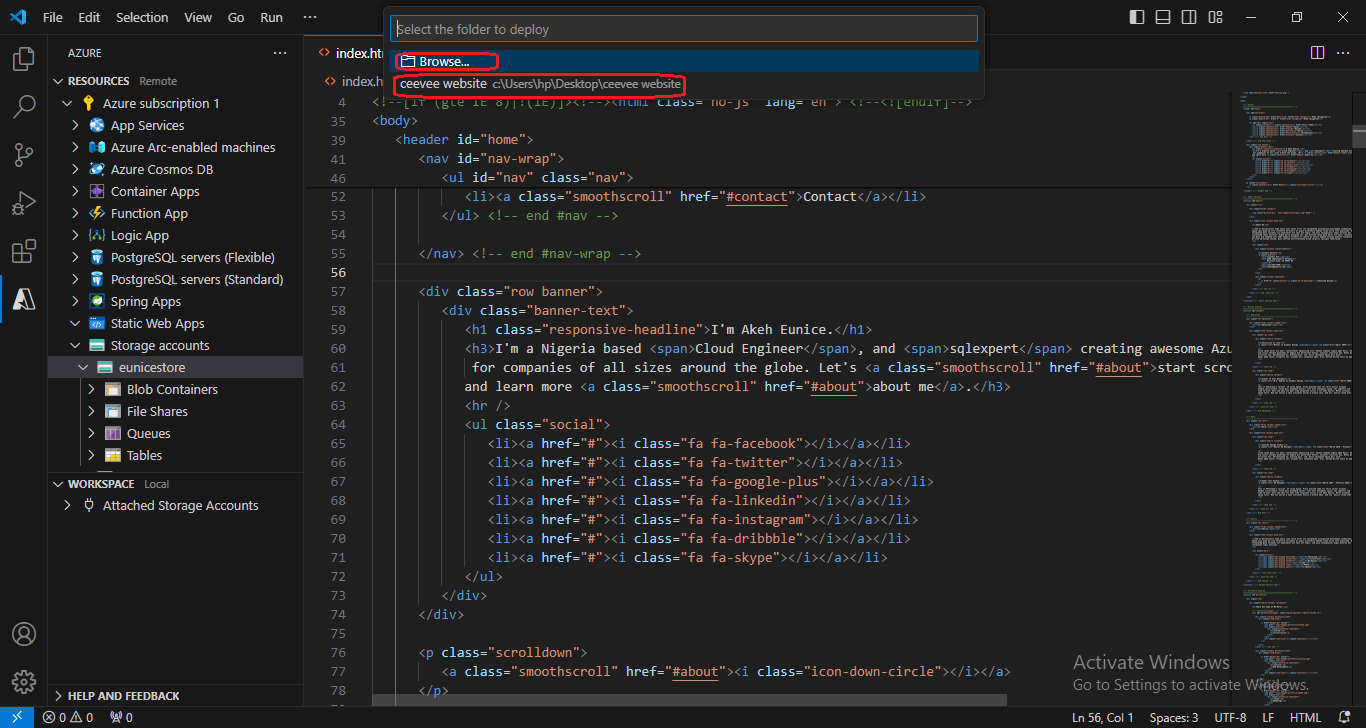
I. You will be directed to choose your folder to launch your static website "Click On" "Browse" "Click On" "Website"
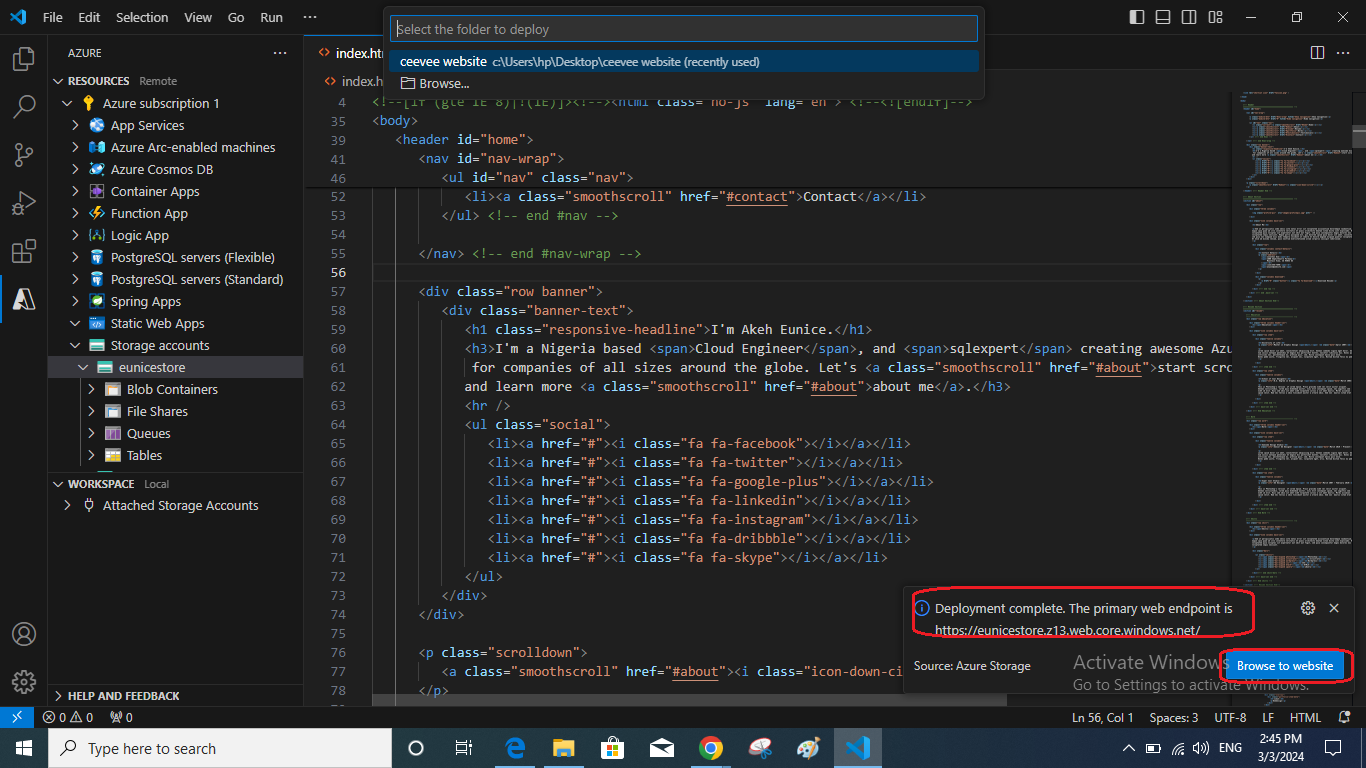
j. Below on the end of the right side you will get a notification "Deployment complete". "Click On" "Browse to website"
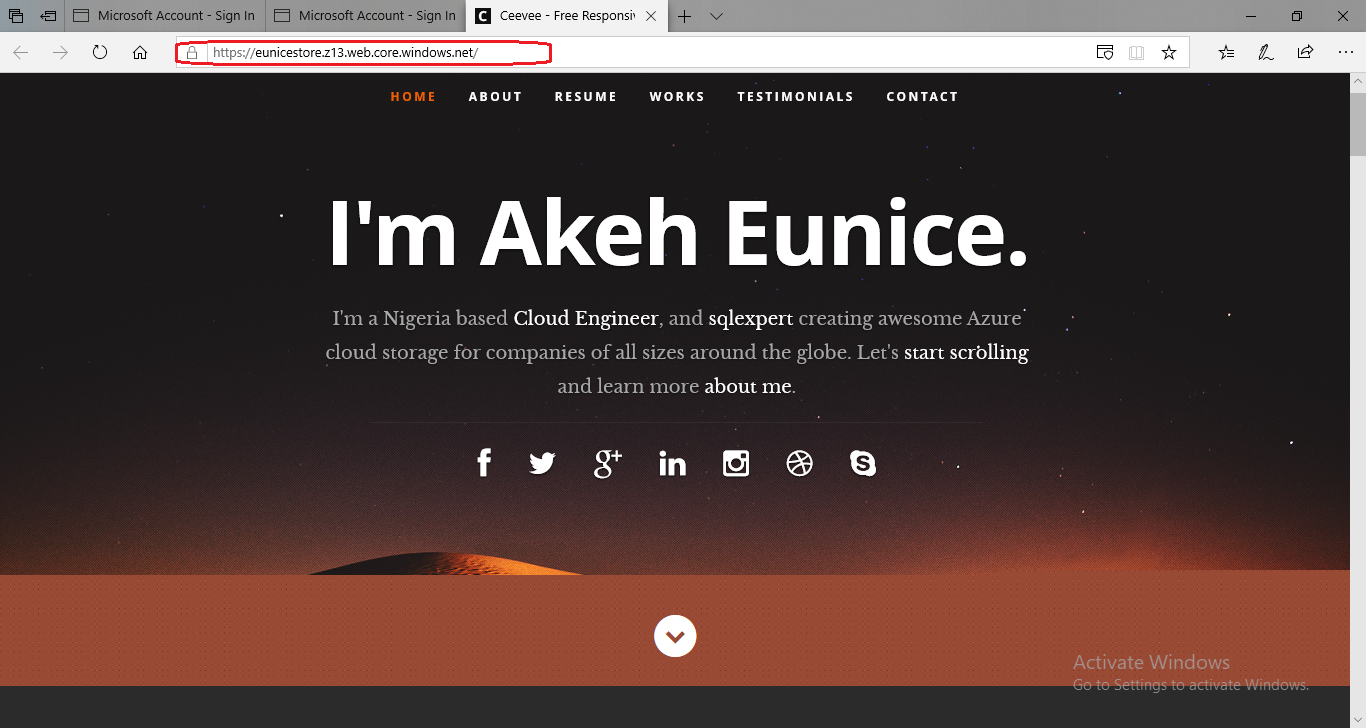
k. You will be redirected to your static website as shown below
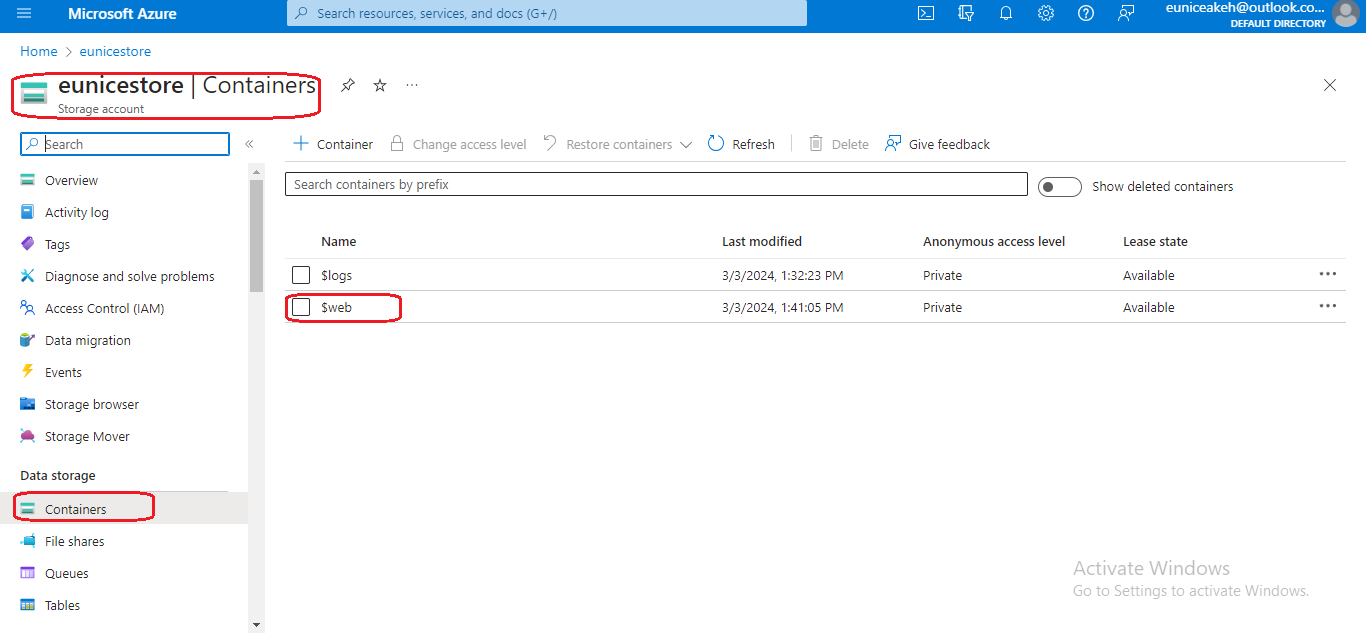
l. After successfully deploying your website Visual Studio Code then your files will be uploaded to your web endpoint in Azure. To view the website data in Azure, On the home page in azure "Click On" Storage account you created. "Click On" "Containers" then "Click On" "web"
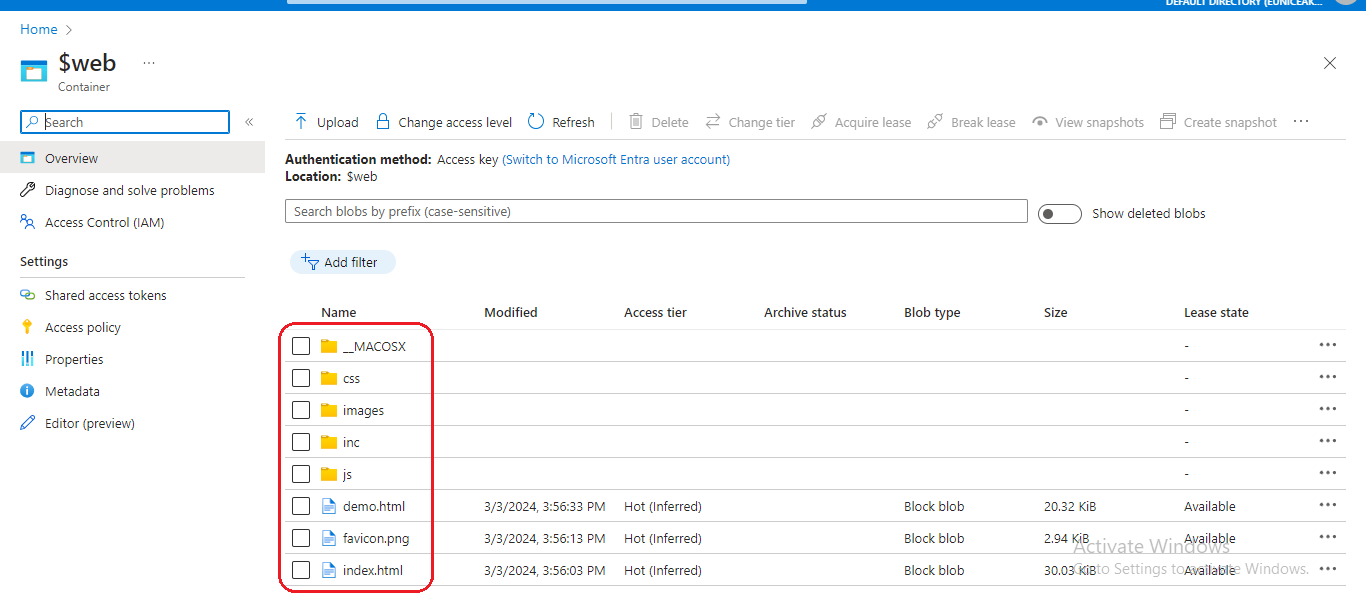
j. View your Static website data on Azure
Conclusion
Congratulations! You have successfully hosted your static website on Azure Blob Storage. Azure Blob Storage offers a reliable and cost-effective solution for hosting static websites, allowing you to focus on creating and managing your content without worrying about infrastructure management.


