A Step-by-Step Guide In Creating A SQL Virtual Machine In Azure

Introduction
In today's cloud-driven world, businesses are increasingly adopting virtual machines (VMs) to efficiently manage their data and applications. Microsoft Azure provides a robust platform for hosting SQL Server databases on virtual machines, offering scalability, reliability, and security. This step-by-step guide will walk you through the process of creating a SQL virtual machine in Azure, enabling you to leverage the power of the cloud for your database needs.
prerequisites
Create an Azure Account with a valid subscription
Download and install SQL SERVER 2022 and SSMS 19 version on your local machine/pc
To Create A New Azure SQL Database, Follow These Steps:
Step1: Log into Azure portal: Open your web browser and navigate to the Azure Portal (https://portal.azure.com)
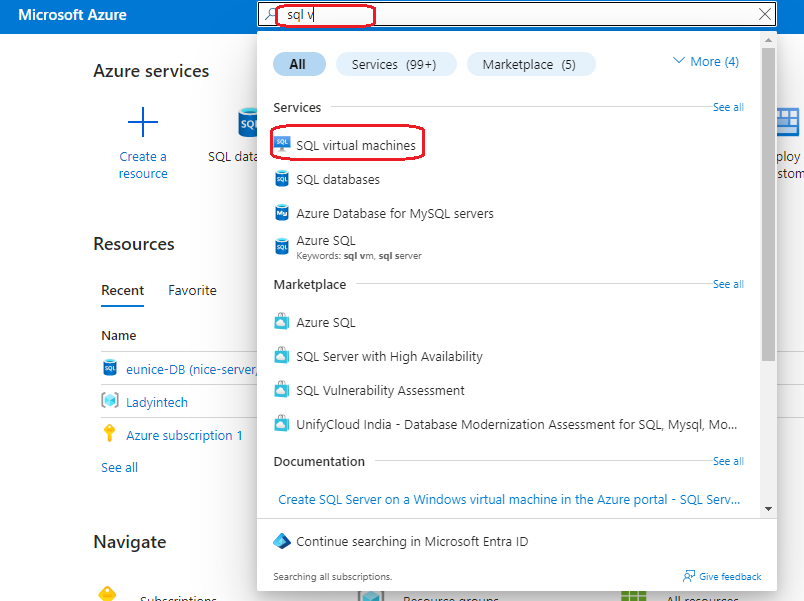
Step2: Search for SQL Server using the homepage's search box
Step3: "Click On" "Create" as highlighted below

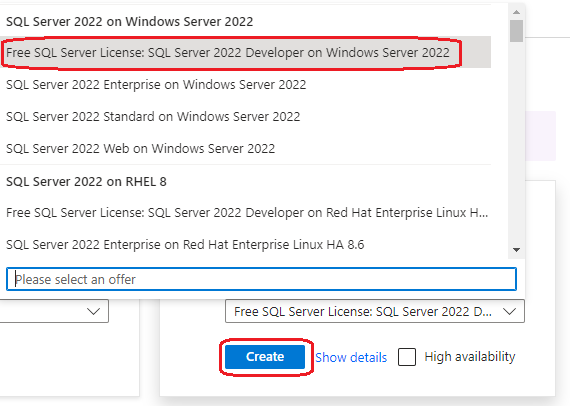
Step4: Select an Image From the SQL virtual machine dropdown

Step4a: "Select" the "Free SQL Server License" and then "Click On" "Create"
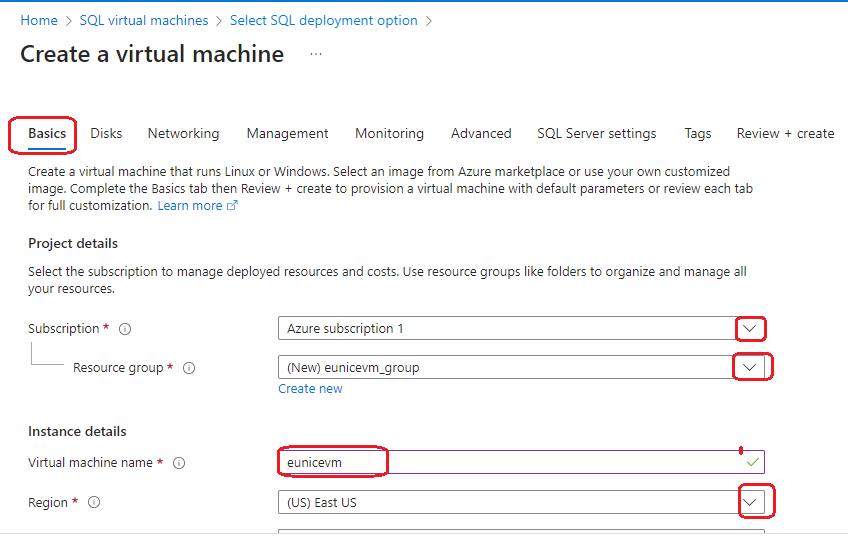
Step5: Fill in Basic Settings Information - "Select" "Subscription" > "Create or Select" "Resource group" > Give your Virtual machine a "Name" and "Select" "Region"
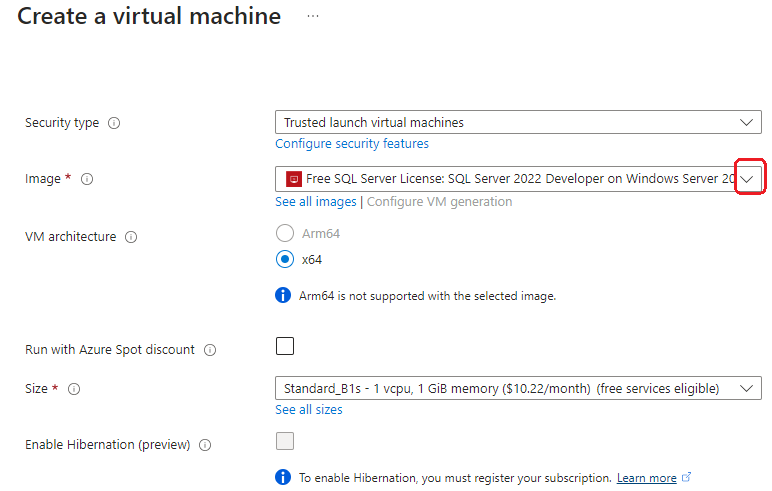
Step5a: Basic Settings - Image has already be select but you can change from the dropdown and leave the rest as default. Note: Select the appropriate VM size based on your workload requirements and budget considerations and Consider factors such as CPU, memory, and storage capacity when choosing the VM size
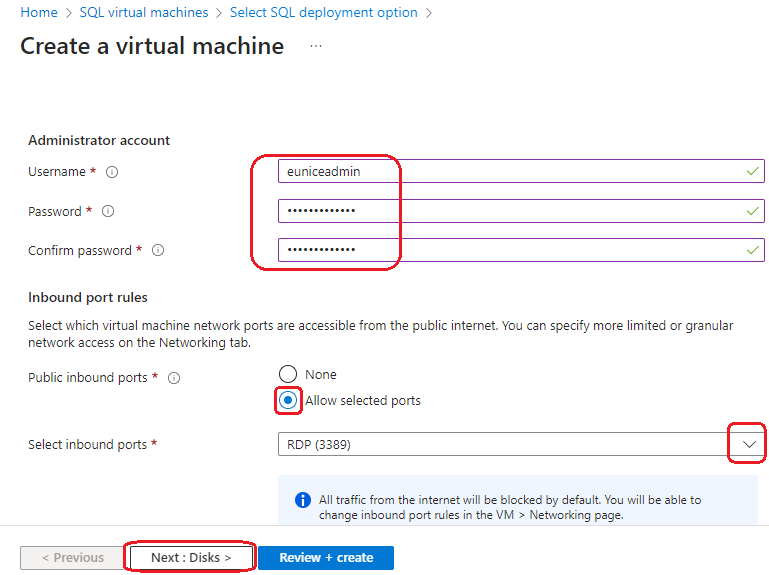
Step5c: Fill in the Administrator Account details - "Username" >"Password" > "Confirm password" and "Tick" "Allowed selected ports" > "Select inbound ports" from the dropdown and then "Click On" "Next: Disks" Note: Note down the server name, database name, and login credentials, as you'll need these later for the migration process
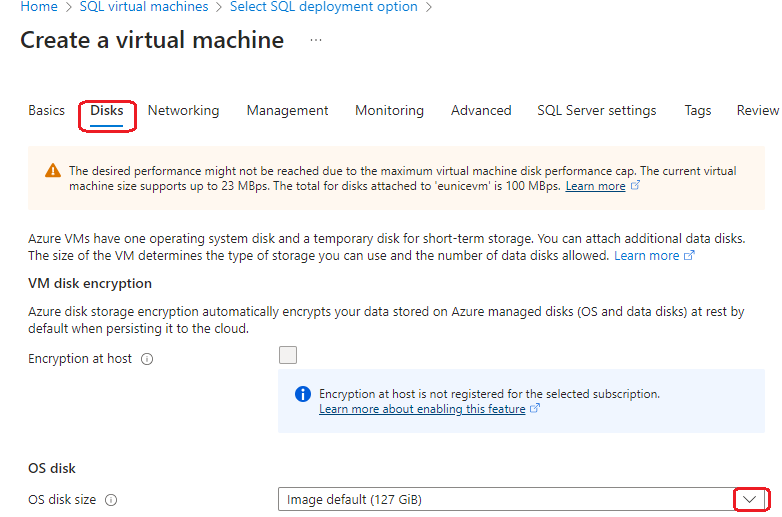
Step6: Disks Settings Tab - From the dropdown "Select" "Os disk size"
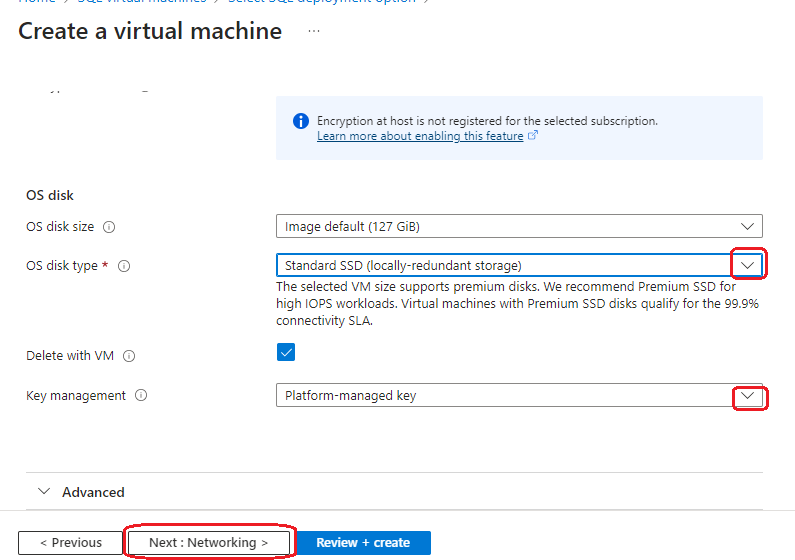
Step6a: Disks Settings - From the dropdown "Select" "OS disk type" to fit your specifications , "Select" "Platform-managed key" and "Click On" "Next: Networking"
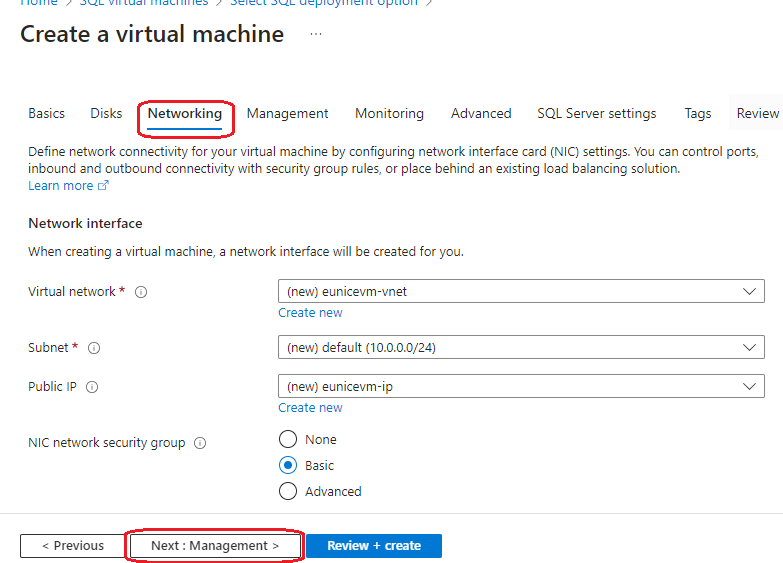
Step7: Networking Settings - Leave as default setting and "Click On" "Next: Management"
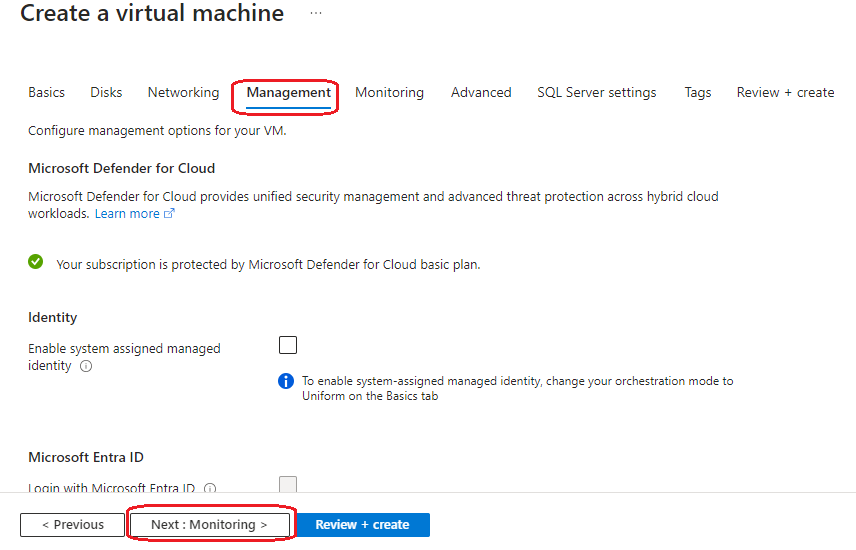
Step8: Management Settings - Leave as default setting and "Click On" "Next: Monitoring"
Step9: Monitoring Settings - Under Diagnostics "Tick" "Enable with managed storage account" and "Click On" "Next: Advanced"

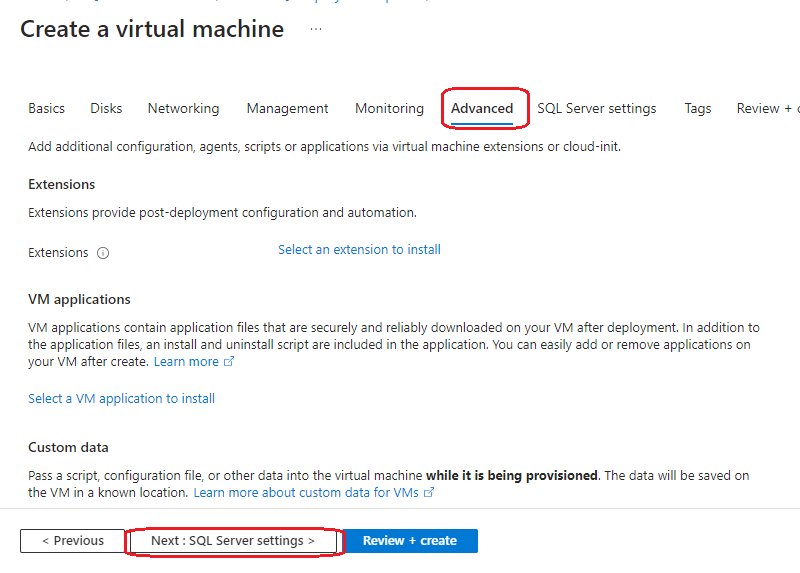
Step10:Advanced Settings - Leave as default setting and "Click On" "Next: SQL server setting"
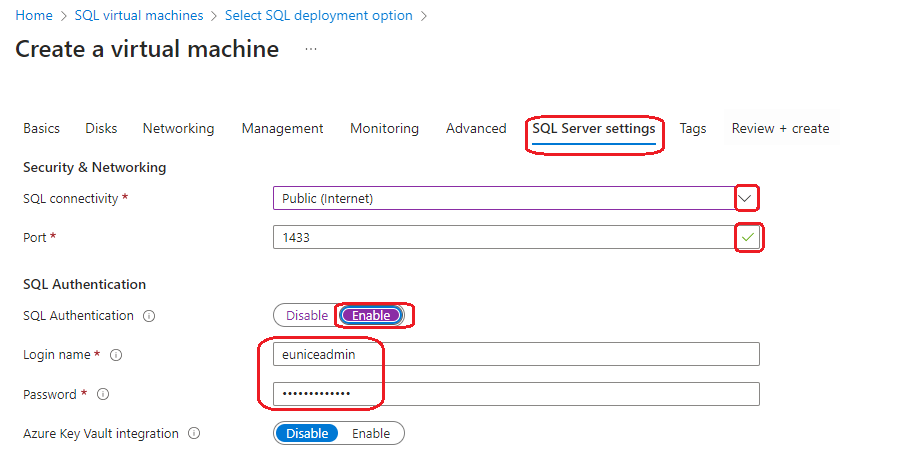
Step11: Configure SQL Server Settings - This step is very important , Select Security & Networking type from the dropdown. "Enable" "SQL Authentication" > Give "Login name" and "Password"
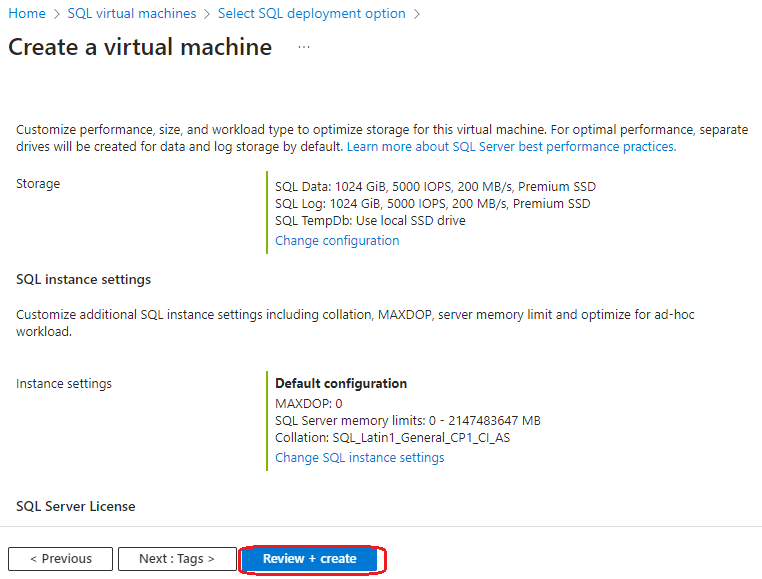
Step11a: SQL Server Settings - Configure your Storage and Instance Settings to suit your specification. "Click On" "Next: Review + Create"
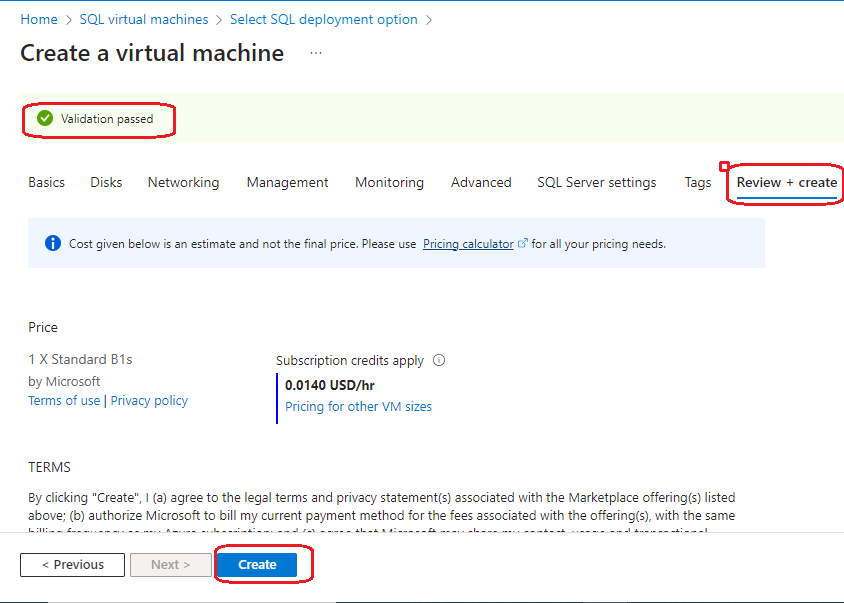
Step12: Review+ Create Settings - Once Validation passed "Click On" "Next: Create"
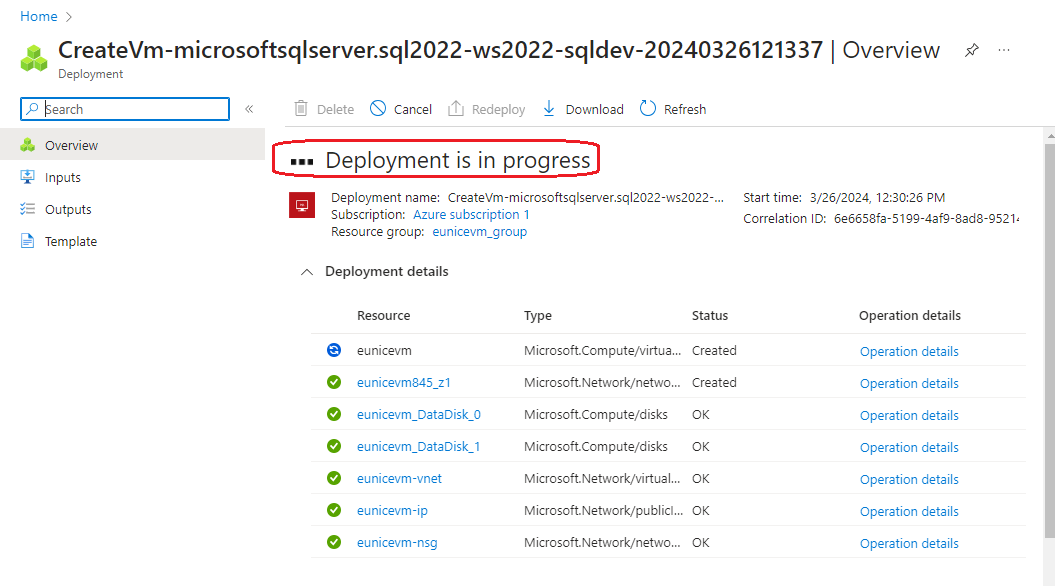
Step13: Deployment in Progress
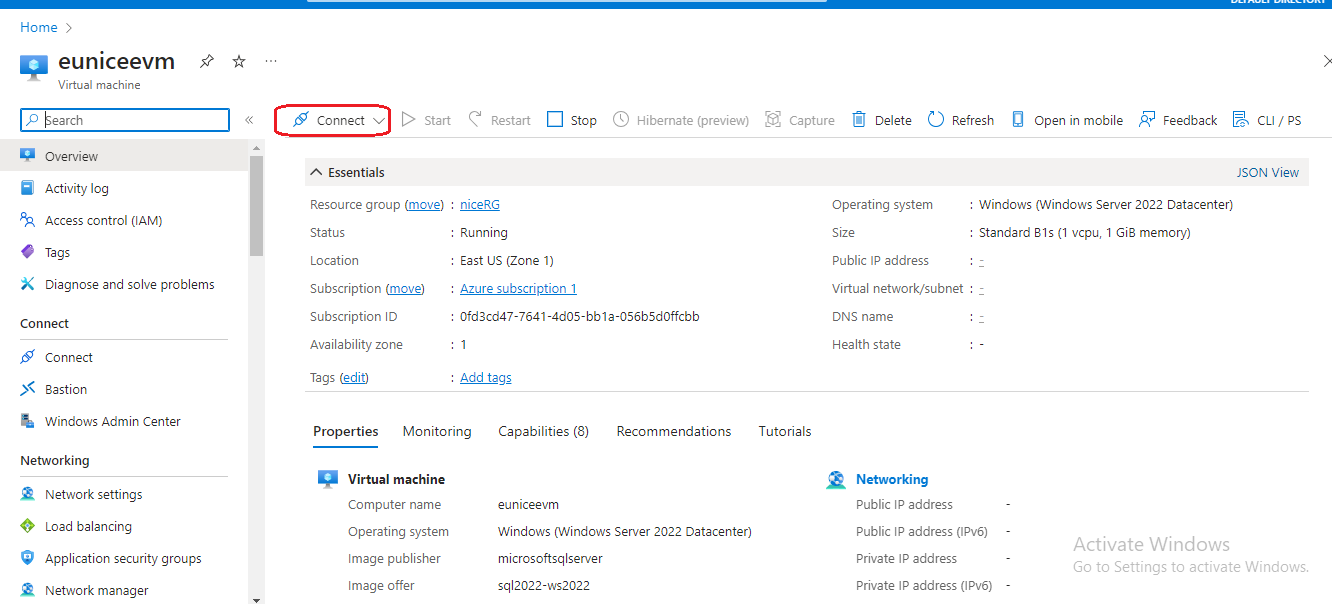
Step14: Connect to your VM Using RDP - Once the deployment is complete, you can access your SQL virtual machine using Remote Desktop Protocol (RDP) "Click On" "Connect"
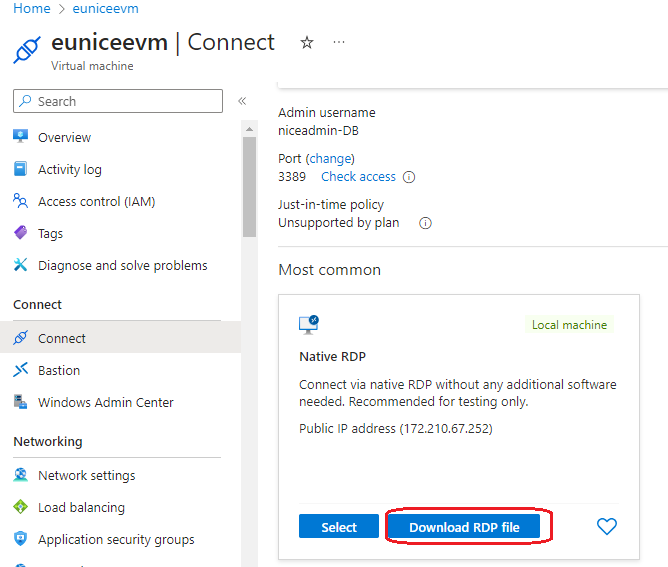
Step15: Download RDP- and save on your local PC
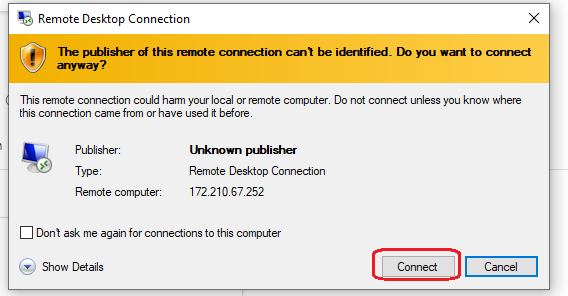
Step16: Connect - Input password and follow prompt until you have successfully accessed your VM
Step17: Connect to the SQL Server instance using SQL Server Management Studio (SSMS) or any other preferred SQL client tool.
Conclusion
Congratulations! You have successfully created a SQL virtual machine in Microsoft Azure, empowering your organization with a scalable and reliable platform for hosting SQL Server databases. By following this step-by-step guide, you can harness the full potential of Azure's cloud infrastructure to optimize your database management processes and drive business growth.


